In this article, you will find information on ingesting metadata under a domain account instead of using login and password as credentials.
There are two ways to ingest data using domain accounts:
| Method | Description |
|---|---|
| Using the on-premises installation of Dawiso | This method works when the Dawiso Worker Service is running under a domain account that has access to the source system from which metadata will be ingested. 1. Add a connection., 2. Create a data source., 3. Ingest the data in Dawiso. The user ingesting the data must be logged into Dawiso with an AD domain account that hasaccess to the server. Dawiso is available as an on-premises installation for enterprise clients. |
| Using Dawiso Integration Runtime (DIR) | This method is used when on-premises sources can’t be accessed from the public Internet (due to e.g., security concerns, firewall), or you are using Dawiso cloud (not on-premises installation). 1. Private connection data ingestion (DIR)Add a private connection., 2. Create a data source., 3. Ingest the data using DIR. DIR must be executed using a domain account that has access to the source from which metadata will be ingested. You can use the runas command to execute DIR under a specific domain account (see below). |
1. Add a trusted connection
-
On the Connections page, click New connection.
-
Select your service, name the connection, and select one of the following:
- Shared connection type: For ingestion via Dawiso.
- Private connection type: For ingestion using DIR.
-
Click Next.
-
In the mandatory Authentication fields (marked by *), use placeholder credentials. Make sure to NOT use your actual credentials, those will be provided later.
-
[SQL Server-specific example]: In the Options field, mark this connection as trusted by using the following syntax:
{ "trusted_connection": true }-
This example is specific to SQL Server. For other providers, please refer to their respective documentation.
-
-
Save your connection.
2. Create a data source
- On the Data sources page, click New data source.
- Select your service and the newly added connection. Click Next.
- Name your data source and click Next.
- In the Databases* field, again, use placeholder names. Real databases will be provided later when using your local machine.
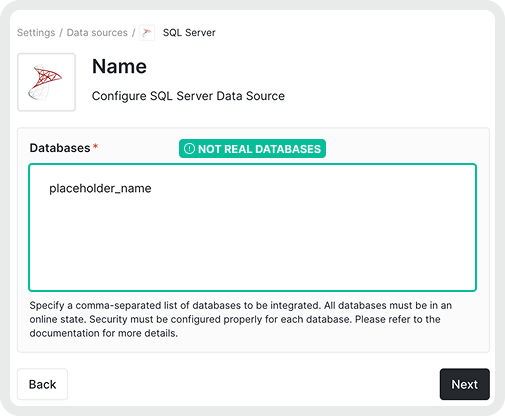
- Finish setting up your data source by selecting your space and workflow.
- DON’T set up any scheduling, this will be taken care of by the local machine.
- Save your data source.
3A. Ingest data via Dawiso Worker (AD Account)
In an on-premises installation of Dawiso (available for enterprise clients), data can be ingested in the standard way using the Dawiso web interface.
This method works when the Dawiso Worker Service is running under a domain account with access to the source system from which metadata will be ingested. The web interface communicates with the source system through the Worker Service, leveraging the permissions of the AD domain account.
If you have multiple domain accounts, you must ingest data using DIR (step 3B) instead.
3B. Ingest your data on your local device using DIR
Make sure you created a private connection for the data source.
- On the Data sources page, identify your data source, click the three dots and select Information.
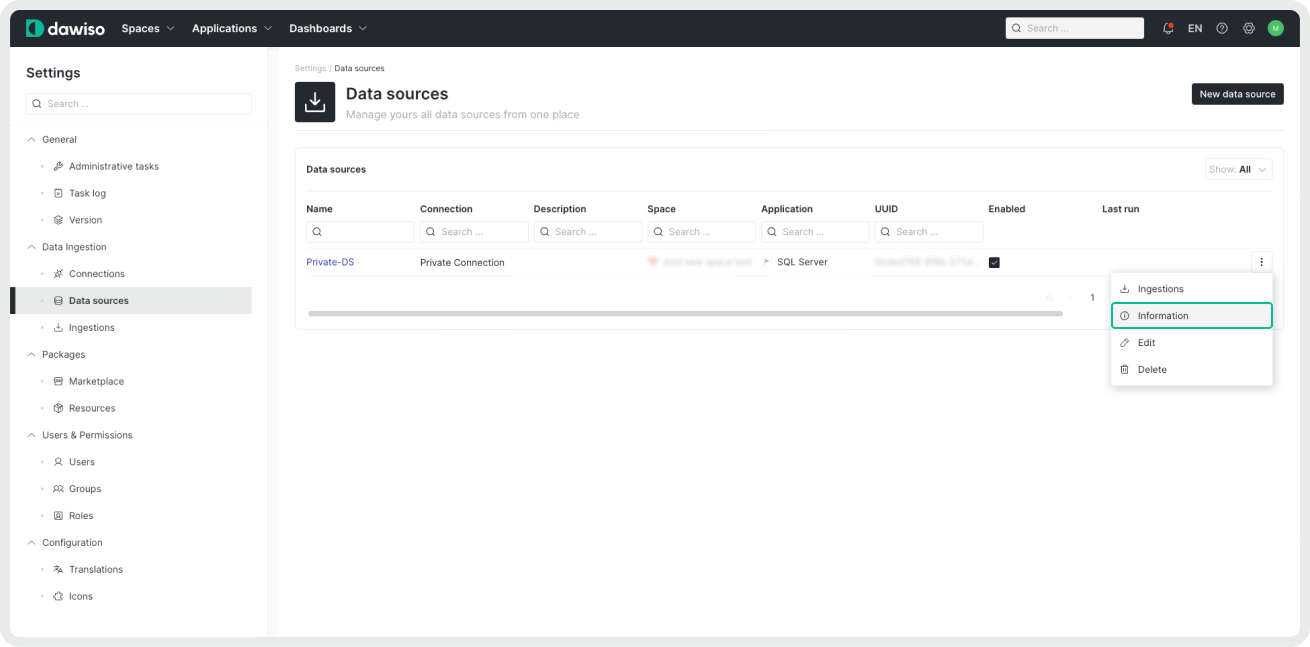
- A window with the data source configuration JSON will pop up.
- Copy the whole configuration JSON.
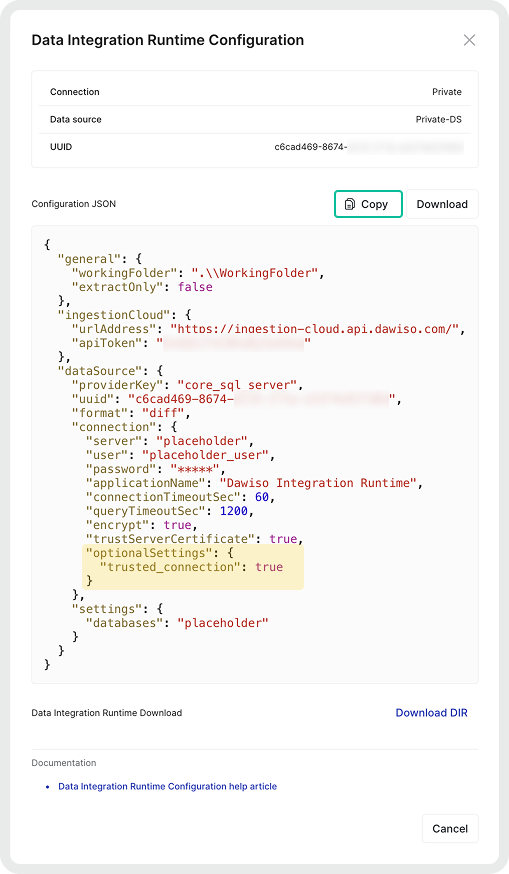
In the screenshot above, the section highlighted in yellow represents provider-specific settings. In this case, we needed to specify to SQL Server that the connection is trusted.
Run DIR
On your device, make sure you are logged in with a domain account that has access to the server. Alternatively, see the Run As section.
- Unzip the downloaded DIR file.
- In the same place as the DIR file(e.g., in the same folder), create two new files (using Notepad, Notepad++, or Visual Studio Code, etc.):
- Name the first file
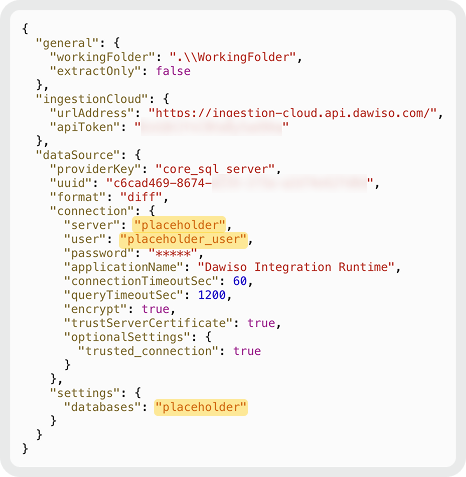
SQL_Server_Config.json.- Open the file and paste in the Dawiso data source configuration JSON.
- Change all the placeholder credentials in the JSON to your actual credentials.
- Name the second file
SQL_Server_Ingest.bat.-
Add the following command in the file
C:\DIR\App\DawisoIntegrationRuntime.exe -c C:\DIR\SQL_Server_Config.json -
This file will run the DIR exe program with the instructions provided in the
SQL_Server_Config.jsonfile.
-
- Name the first file
- Wait for the test ingestion to finish.
- [Optional] Check the logs in the console or in the following folder:
[/WorkingFolder]\\WorkingFolderto confirm whether the ingestion was successful.. - Once you confirm that everything is working correctly, use e.g., Windows Task Scheduler to execute the.bat file (= data ingestion) regularly.
Run DIR using runas command
To run DIR under a specific user account, you can use the runas command on Windows:
runas /user:your_domain\your_user_name "C:\DIR\App\DawisoIntegrationRuntime.exe -c C:\DIR\SQL_Server_Config.json"If you need to run DIR on a schedule, you can use Windows Task Scheduler, where you can specify your domain account and password to be used when the task is executed.
We recommend scheduling the ingestion to be once a day at the same time, e.g., after every nightly data warehouse build.