Objects represent all your business assets and information.
Objects come in various types, which are defined by applications. By selecting the appropriate object type during creation, you ensure data consistency and relevance.
Object types specify:
- Attribute types (attributes range from common details like description or definition to ownership-related aspects)
- Object relations
- Workflow configurations
Examples of object types include business term, document, diagram, etc. Each application has its specific object types.
Object page
Every object will have an object page and an object detail. An object page always has an object header, configurable contents, and an optional activities section.
| Element | Description |
|---|---|
| Object header | Header of every object. It always consists of the following mandatory elements: Object path (breadcrumb that you can easily copy), Object name, Object type Other configurable elements include: Quick actions, Workflow state, Jira integration, Fullness score, Options: Individual options can be hidden using Object Template Settings. |
| Object page | The main content of the object. Here, you will find attributes and details on the object. The object page is fully configurable using packages. |
| Activities and changelog | The comment section and a changelog can be found at the bottom of the page. This is an optional component, both the comment section or the changelog can be configured and hidden using Object Template Settings. |
| Object detail | Object preview in advanced search, diagrams, and other areas with limited space. Default configuration exists but can be fully configured using Object Detail. 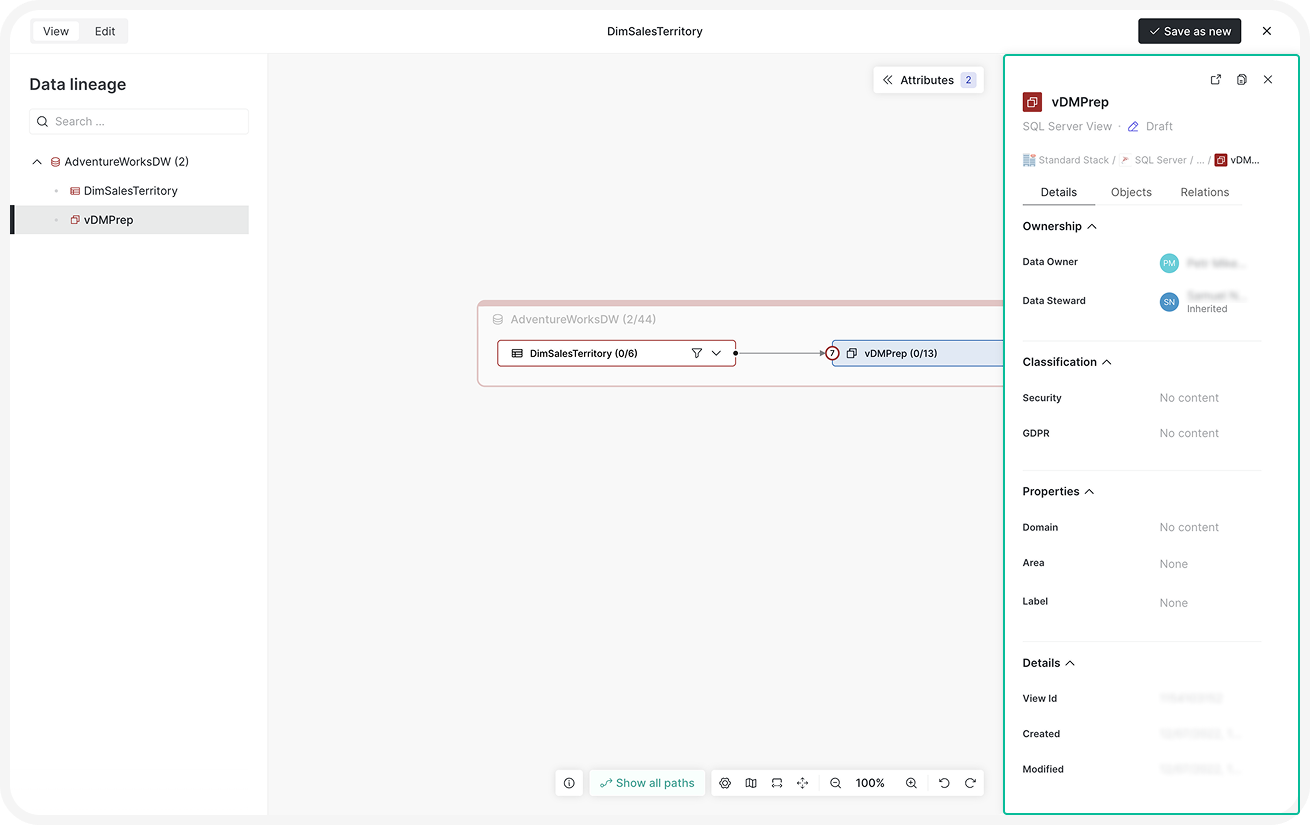 |
Object actions
Add an object
In Dawiso, there are parent objects and child objects. Parent objects typically serve as categories for child objects.
- In the top navigation bar, click Create to add a new object. There are two ways you can determine the object’s path:
- Automatic path detection: Dawiso will detect the current object you have opened and create its child object accordingly.
- Manual path selection: Choose a specific space, app, or parent object (select box called Add to) to create a new object independent of your current location.
- Name your object and select its object type. For more information on object types, what they mean, and possible relations, refer to the application-specific articles.
- Finish by clicking Create.
You can also create an object using the following ways:
- In the top-right of your app, click +.
- In the left-side hierarchy click the three dots next to an object to add its child object.
- In the object header, click the three dots on the right side and select Add child object.
Clone an object
- In the top-right of your Object page, click the three dots. Or click the three dots next to the object in the Explorer.
- Select:
- Clone: Create a copy of the object along with the full hierarchy when applicable.
- Clone without child objects: Create a copy of the object without any children.
Cloning is available under the following conditions:
- The hierarchy is not read-only.
- The user has at least Contributorrole with write permissions. Disable cloning by making the hierarchy read-only in package settings configuration.
Behavior of cloned objects:
- The cloned object will have the same name and its clone number in brackets (e.g.,
Abbreviation (1)). - It will start in the default workflow state defined for its object type.
- If cloning a hierarchy, child objects will also be cloned with:
- The same structure and content.
- Their own default workflow states.
- Their original names (no clone number in brackets).
- Relations and links between objects will be recalculated.
- User-specific relations such as watching, liked/disliked, and shared with me will not be copied to the new object.
Export an object
To export a single object:
- In the top-right of your Object page, click the Export button. Or click the three dots next to the object in the Explorer.
- Select your file type (Excel, Word, or PDF).
- Continue with selecting what attribute types, relation types, and user relations your export should include.
- Confirm by clicking Export.
- Download the file:
- From the notification toast that pops up.
- In the top-right of Dawiso, click the notifications bell and find the Click to download link.
To download all objects in an application, see Object export (Excel, Word, PDF).
Delete an object
- In the top-right of your Object page, click the three dots .**Or click the three dots next to the object in the Explorer.
- Select Delete.
- Confirm deletion.
Manage objects
Change object name
To change your object name, choose one of the following methods:
- Click your object name in the Object header. Change the name and click ✓ to save.
- In the top-right of your Object page, click the three dots and select Rename. Change the name and confirm.
Change object type
Object type can’t be changed. Create a new object with your desired object type.
Move an object
- In the top-right of your Object page, click the three dots .
- Select Move.
- Select the:
- Target space: Change the space if you want to move the object to another space.
- Target object: Select the new parent object.
Alternatively, you can also move the objects by holding and dragging directly in the Explorer. Objects can be moved only by users with sufficient permissions.
Edit attributes
In Dawiso, object attributes are essential components that define the characteristics of a specific object. They serve as descriptive elements that provide key information about the object itself.
Attributes can vary widely depending on the app. In general, there are two attribute types:
- User-generated attributes that can be added and edited in Dawiso using a WYSIWYG HTML editor (such as descriptions, calculations).
- Scanned attributes that are automatically created for data objects via ingestion.
Track changes
To check changes made to an object, choose one of the following methods:
- In the top-right of your Object page, click the three dots . Select Changes.
- Scroll down to Activities. Switch to the Changes tab.
For more information, see Activities.
Object hierarchy (Explorer)
The object hierarchy (or explorer) provides a structured view of all objects and how they are nested within one another. It helps users quickly understand the organization of content, navigate through complex structures, and locate related items with ease. This is especially useful when working with large datasets or documentation, as it gives clear context.
Next to your Explorer, click the three dots to:
- Go back to application overview page
- Add a new object
- Sort all objects
- Toggle object numbering
- Export objects
Object Numbering
When object numbering is enabled for an application, you can:
- Toggle the function in the Explorer menu and
- Configure the starting number for the sequence.
Numbering in object names
- The assigned numbers become a part of the object name and are automatically updated when changes occur in the object hierarchy. These numbers are also displayed in object names within tables, and (when configured) included in exports.
Numbering in impact analysis
- If object numbering is used in impact analysis, any change to the numbering will automatically trigger a recalculation to maintain accuracy.
Other object features
For more information on objects, see the following articles:
- Attachments: Manage attachments for your object.
- Concepts: Create and edit object page concepts.
- Object import & export: Automatically import or export objects using .XLSX files.
- Types of attributes: Explore different types of object attributes.