Before ingesting Azure Data Factory metadata into Dawiso, prepare your account for authentication by configuring an Azure Application and granting the necessary permissions.
Supported Azure Data Factory versions
- Dawiso reads metadata from the Azure Data Factory API and is up to date with latest API changes.
Connection prerequisites
- An active Azure Portal subscription (you can create one for free)
- Microsoft Entra ID administrative access
Connection configuration
In this guide, you will:
- Configure an Azure application.
- Generate a Client Secret.
- Test the application for a successful connection to Azure AD.
- Configure a Power BI Tenant to allow Service Principals to read the new Admin API.
- Allow Service Principal access to individual workspaces.
Register a new application
You need to register a new application in Microsoft Entra ID.
- In your Azure Portal, navigate to Microsoft Entra ID.
- In the left menu, select the App Registrations. Click the + New Registration button.
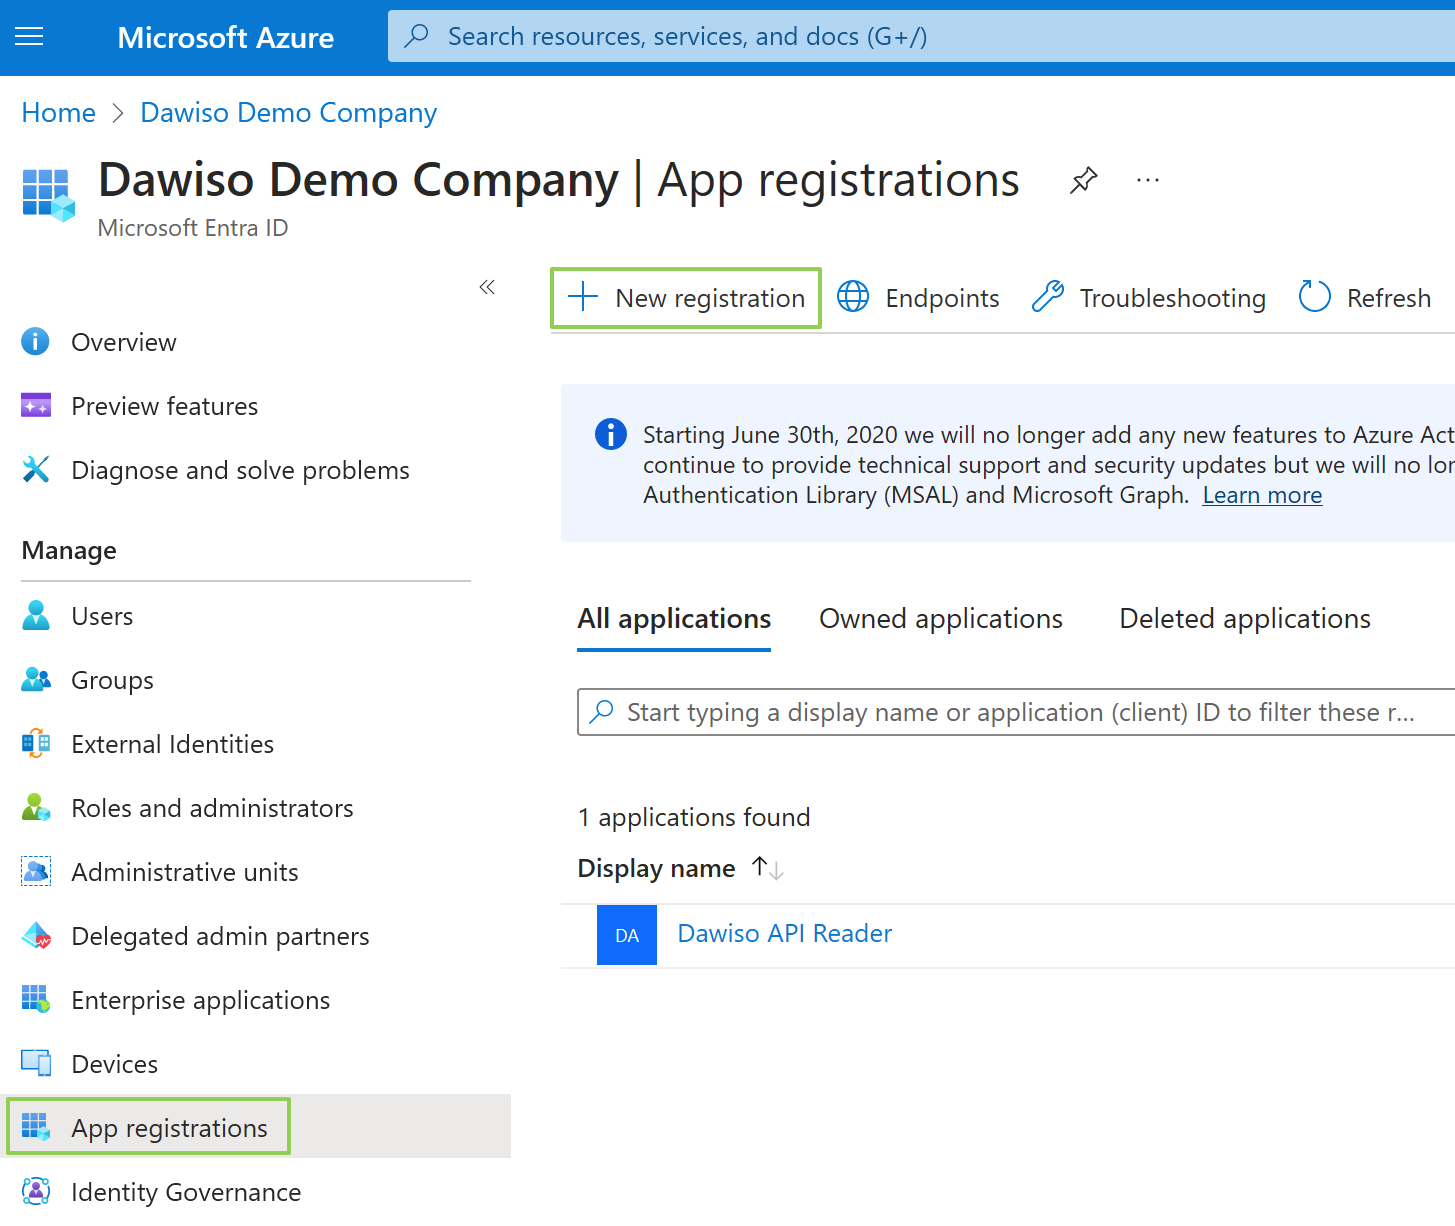
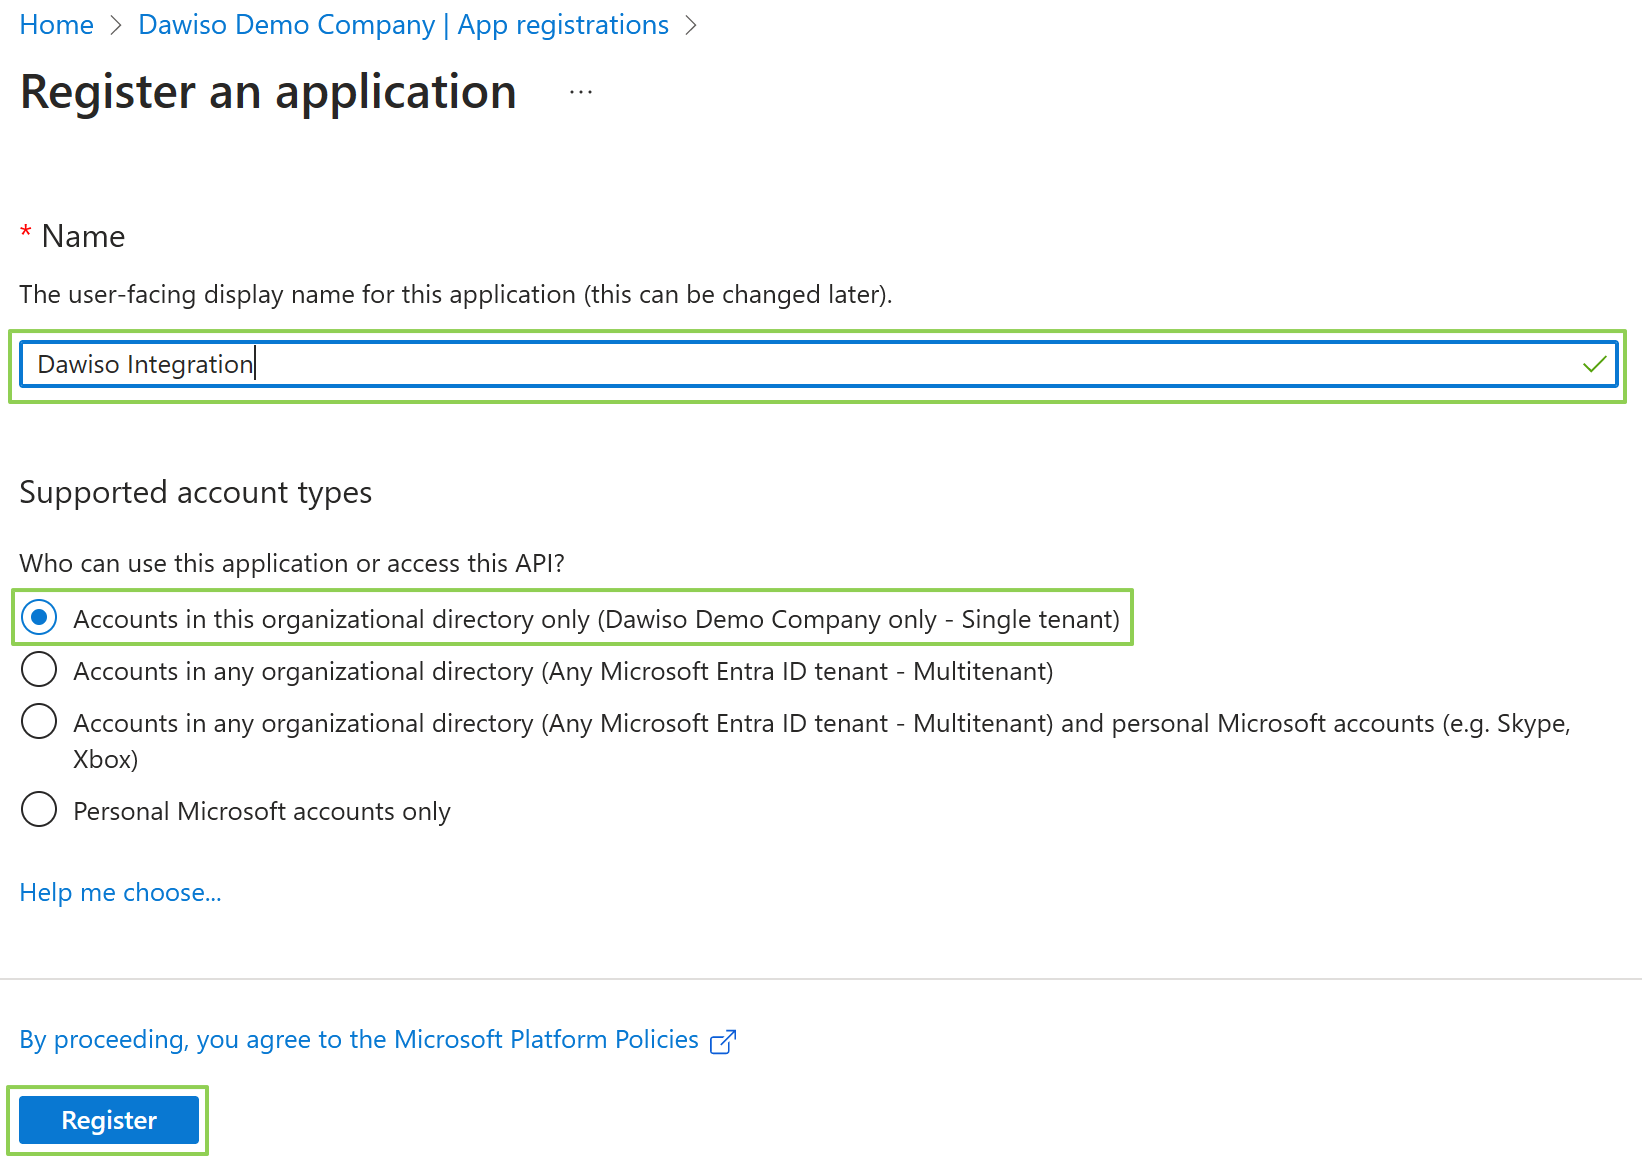
- Choose a name name for your application, e.g., Dawiso Integration. You can keep default values for the rest of the form.
- Click Register and wait for the deployment to finish.
Client and tenant IDs
On the Overview page, you can find important values that identify your application. These will be used in the connection setup in Dawiso:
- Application (client) ID is the unique identification of the application.
- Directory (tenant) ID is the unique identification of your tenant (organization).
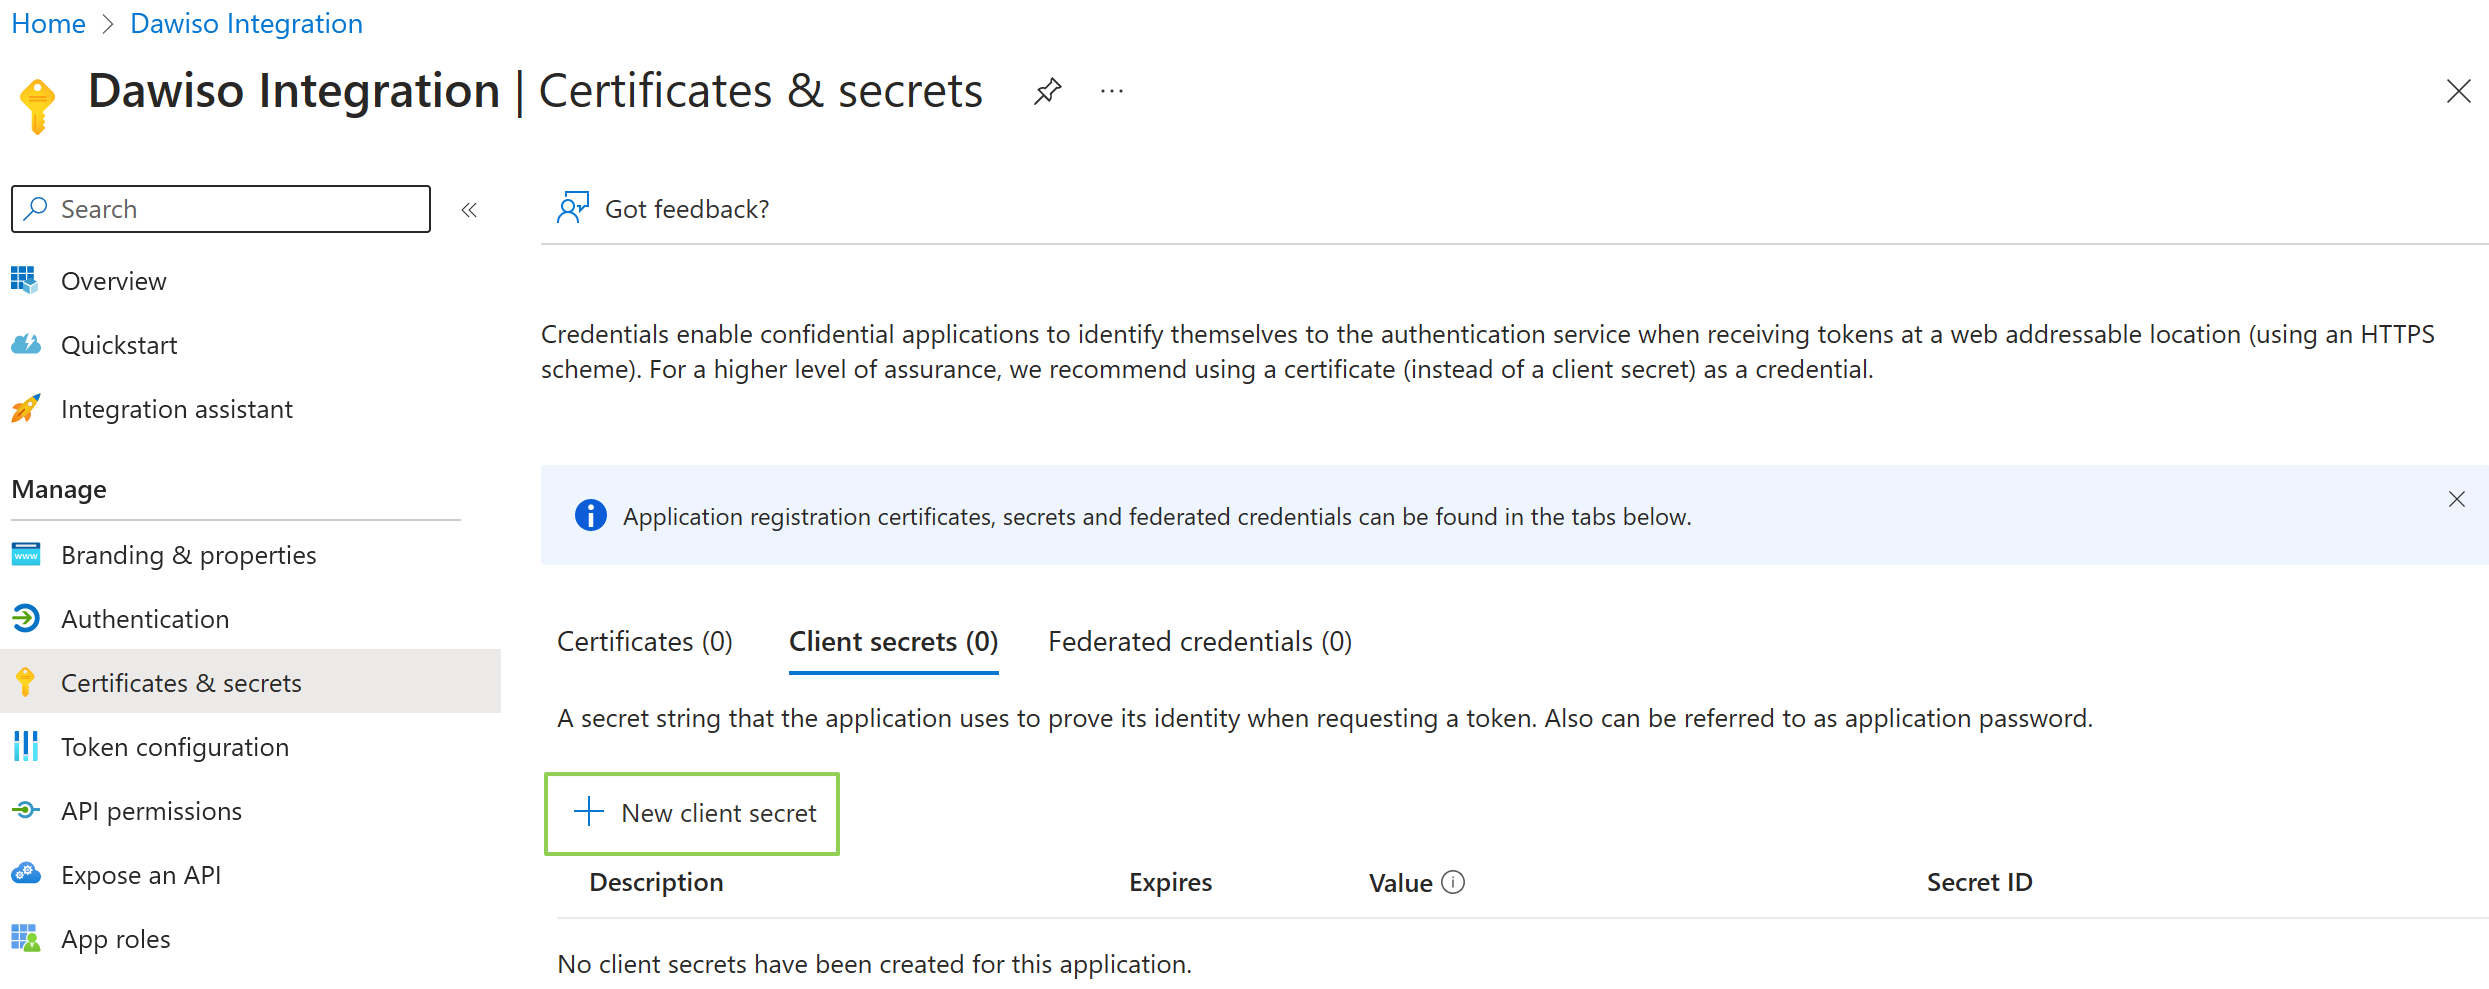
Generate Client Secret
Now, you will need to generate a client secret to later authenticate the connection.
- In the left menu, select Certificates & secrets.
- Here, click + New client secret.
- Choose a descriptive name for the client secret and select an expiration date that fits your organization’s requirements.
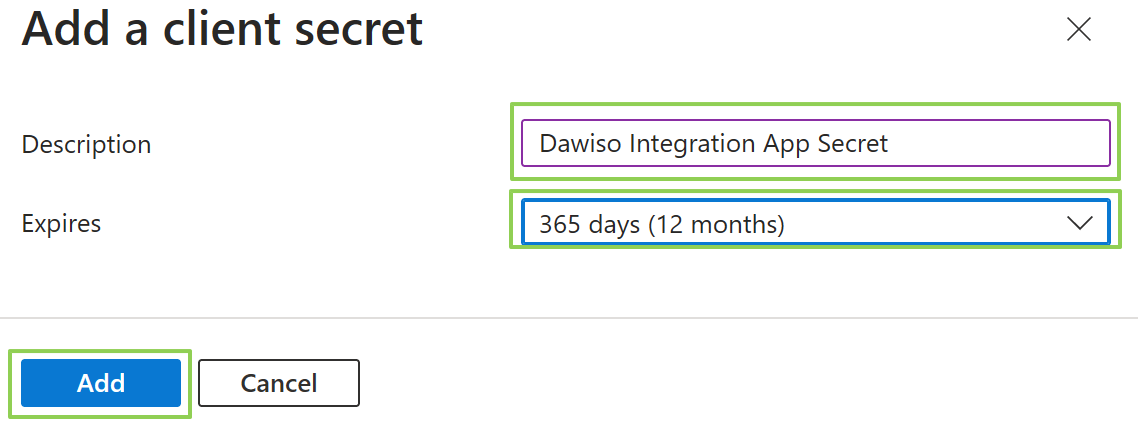
- Click Add to finish creating the secret.
- Once the secret is created, make sure to copy the value and store it somewhere safe for later use. The secret cannot be displayed twice.
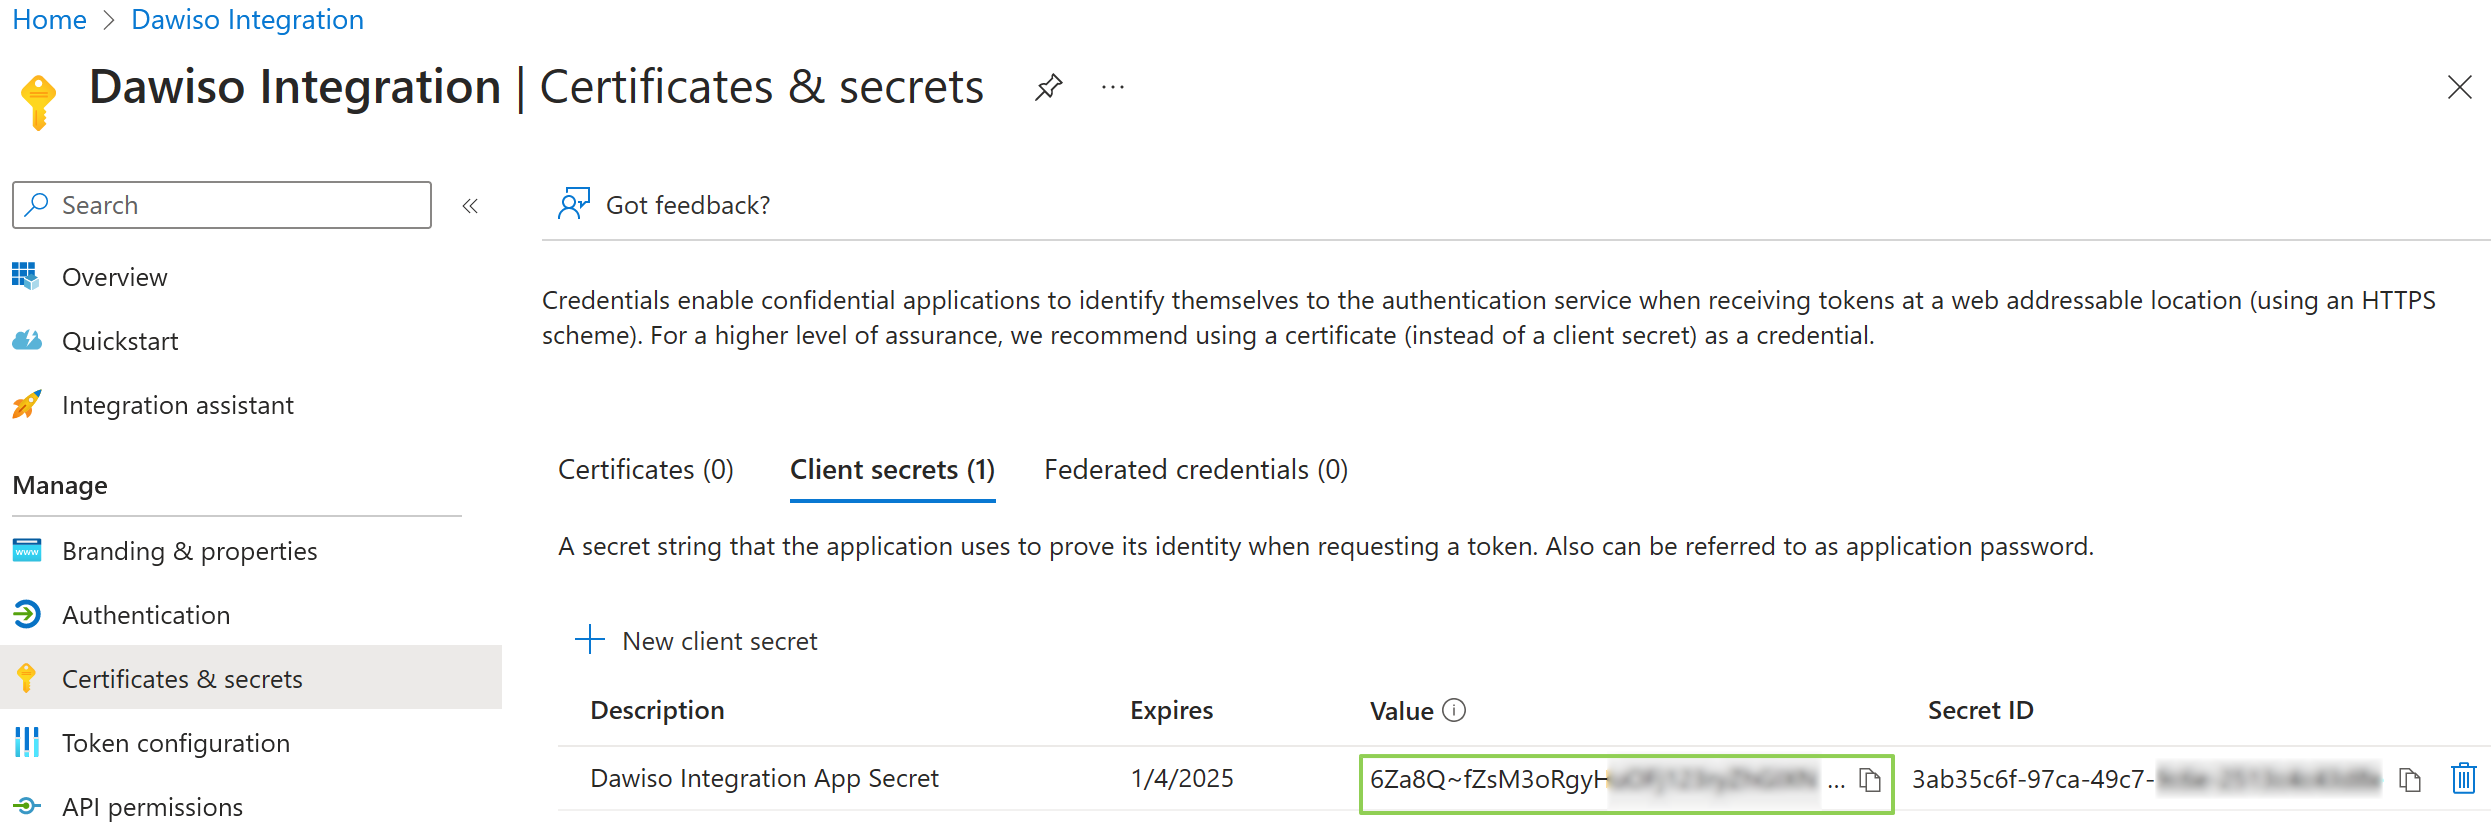
The secret value is displayed only once. Copy and save it immediately, otherwise you will need to generate a new client secret if it is lost.
Grant Access to Data Factories
You can grant permissions at different scopes depending on how broad you want scanning to be:
- Subscription level → the service principal can read all Data Factories in that subscription.
- Resource group level → the service principal can only read Data Factories inside that RG.
- Factory level → the service principal can read only a single ADF.
For scanning multiple ADFs, subscription or resource group scope is usually easiest.
Assign the Built-In Reader role
- Navigate to the scope you chose:
- Subscription → Subscriptions → pick the right one.
- Resource Group → Resource groups → pick the right one.
- Factory → Data factories → pick the right factory.
-
In the left panel, select Access control (IAM).
-
Click Add → Add role assignment.
-
In the Role tab:
- Search for Reader.
- Select Reader and click Next.
- In the Members tab:
- Choose User, group, or service principal.
- Click Select members.
- Find your service principal (app name) and select it.
- Click Review + assign.