Before ingesting Microsoft Entra metadata into Dawiso, prepare your account for authentication by configuring an Azure Application and granting the necessary permissions.
Connection prerequisites
- An active Azure Portal subscription (you can create one for free)
- Microsoft Entra ID administrative privileges
Connection configuration
Dawiso scans metadata from the Microsoft Graph API. Authentication is performed via service principal.
In this guide, you will:
- Configure an Azure application.
- Generate a Client Secret.
- Allow the service principal to read necessary object from the Microsoft Graph API.
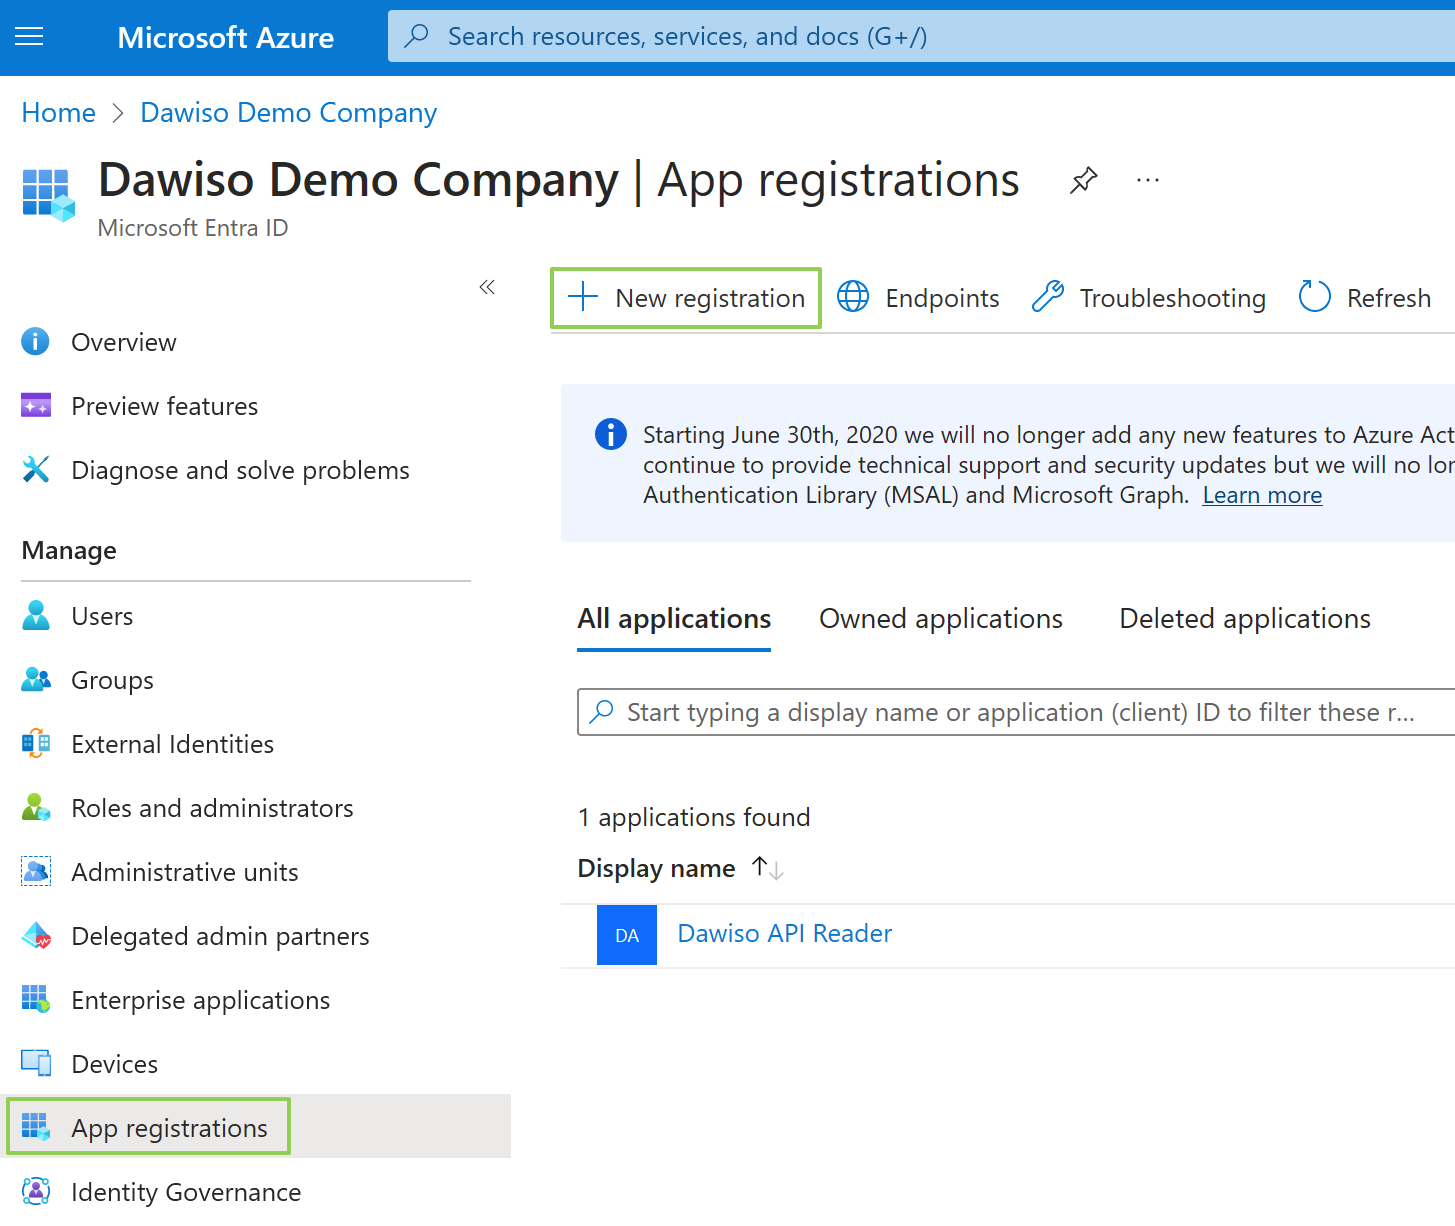
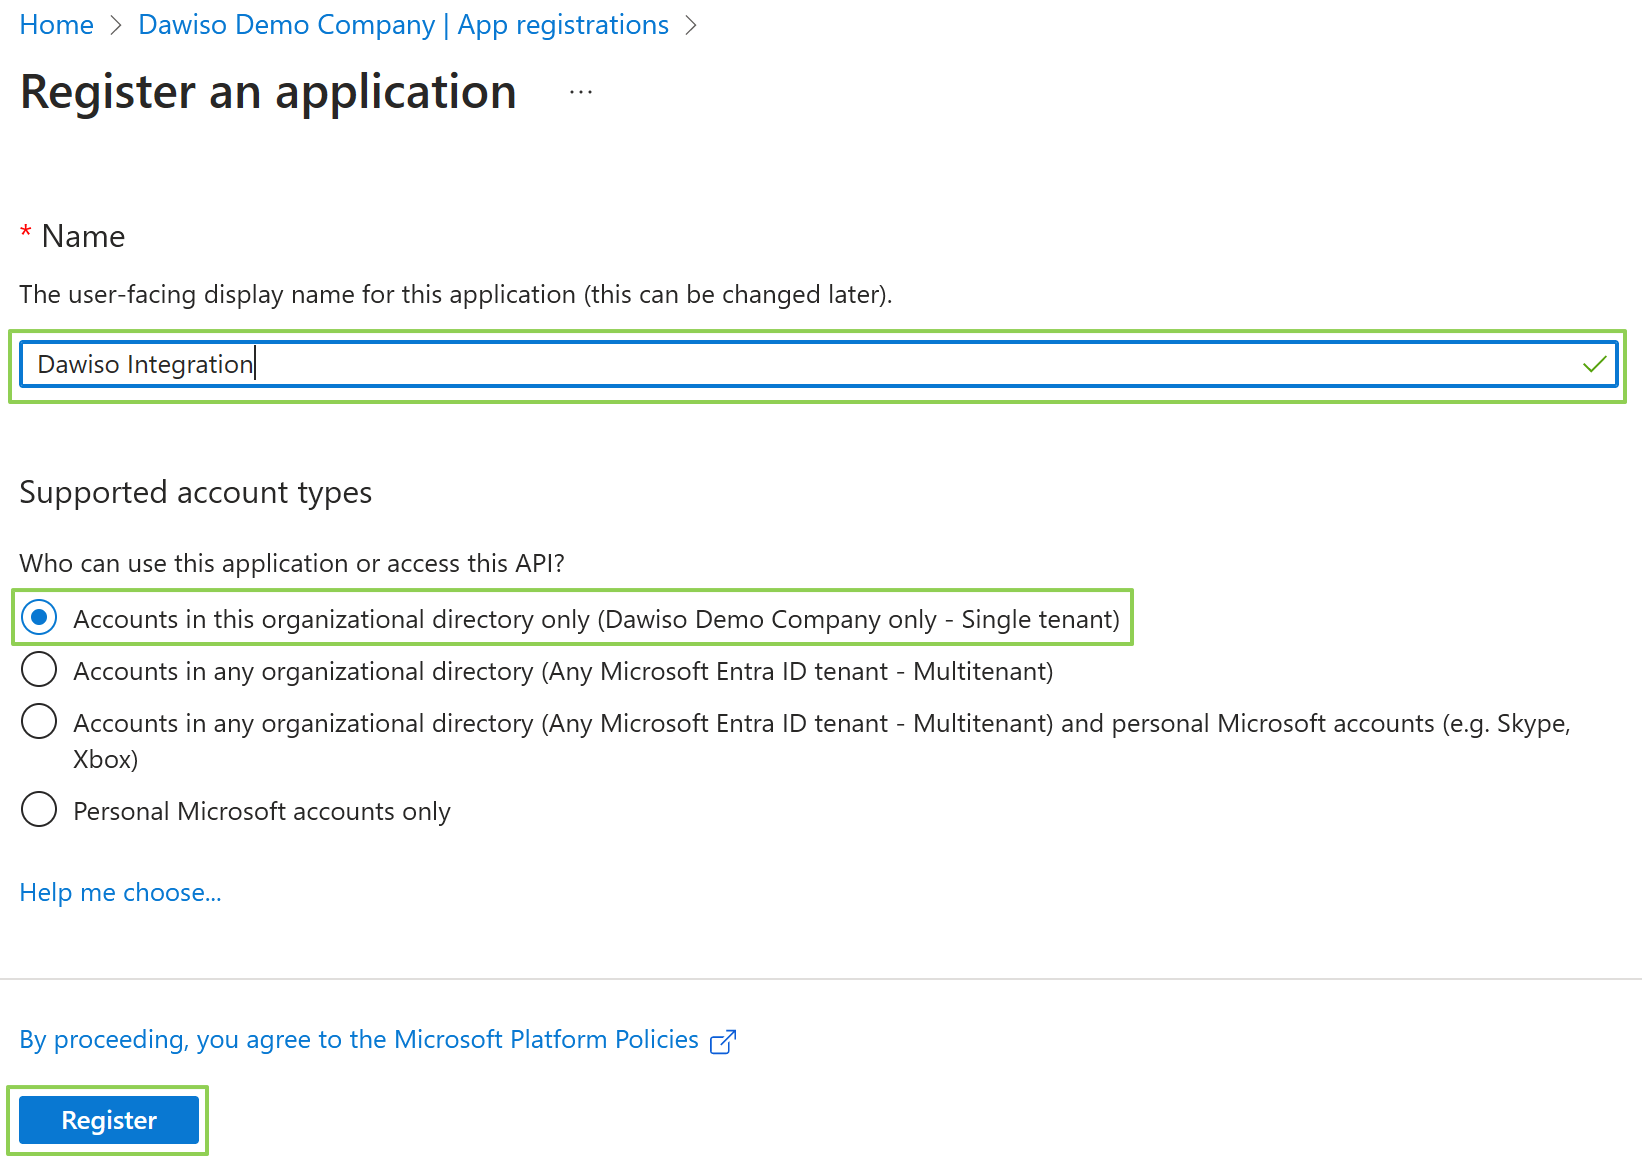
Register a new application
You need to register a new application in Microsoft Entra ID.
- In your Azure Portal, navigate to Microsoft Entra ID.
- In the left menu, select the App Registrations. Click the + New Registration button.
- Choose a name name for your application, e.g., Dawiso Integration. You can keep default values for the rest of the form.
- Click Register and wait for the deployment to finish.
Client and tenant IDs
On the Overview page, you can find important values that identify your application. These will be used in the connection setup in Dawiso:
- Application (client) ID is the unique identification of the application.
- Directory (tenant) ID is the unique identification of your tenant (organization).
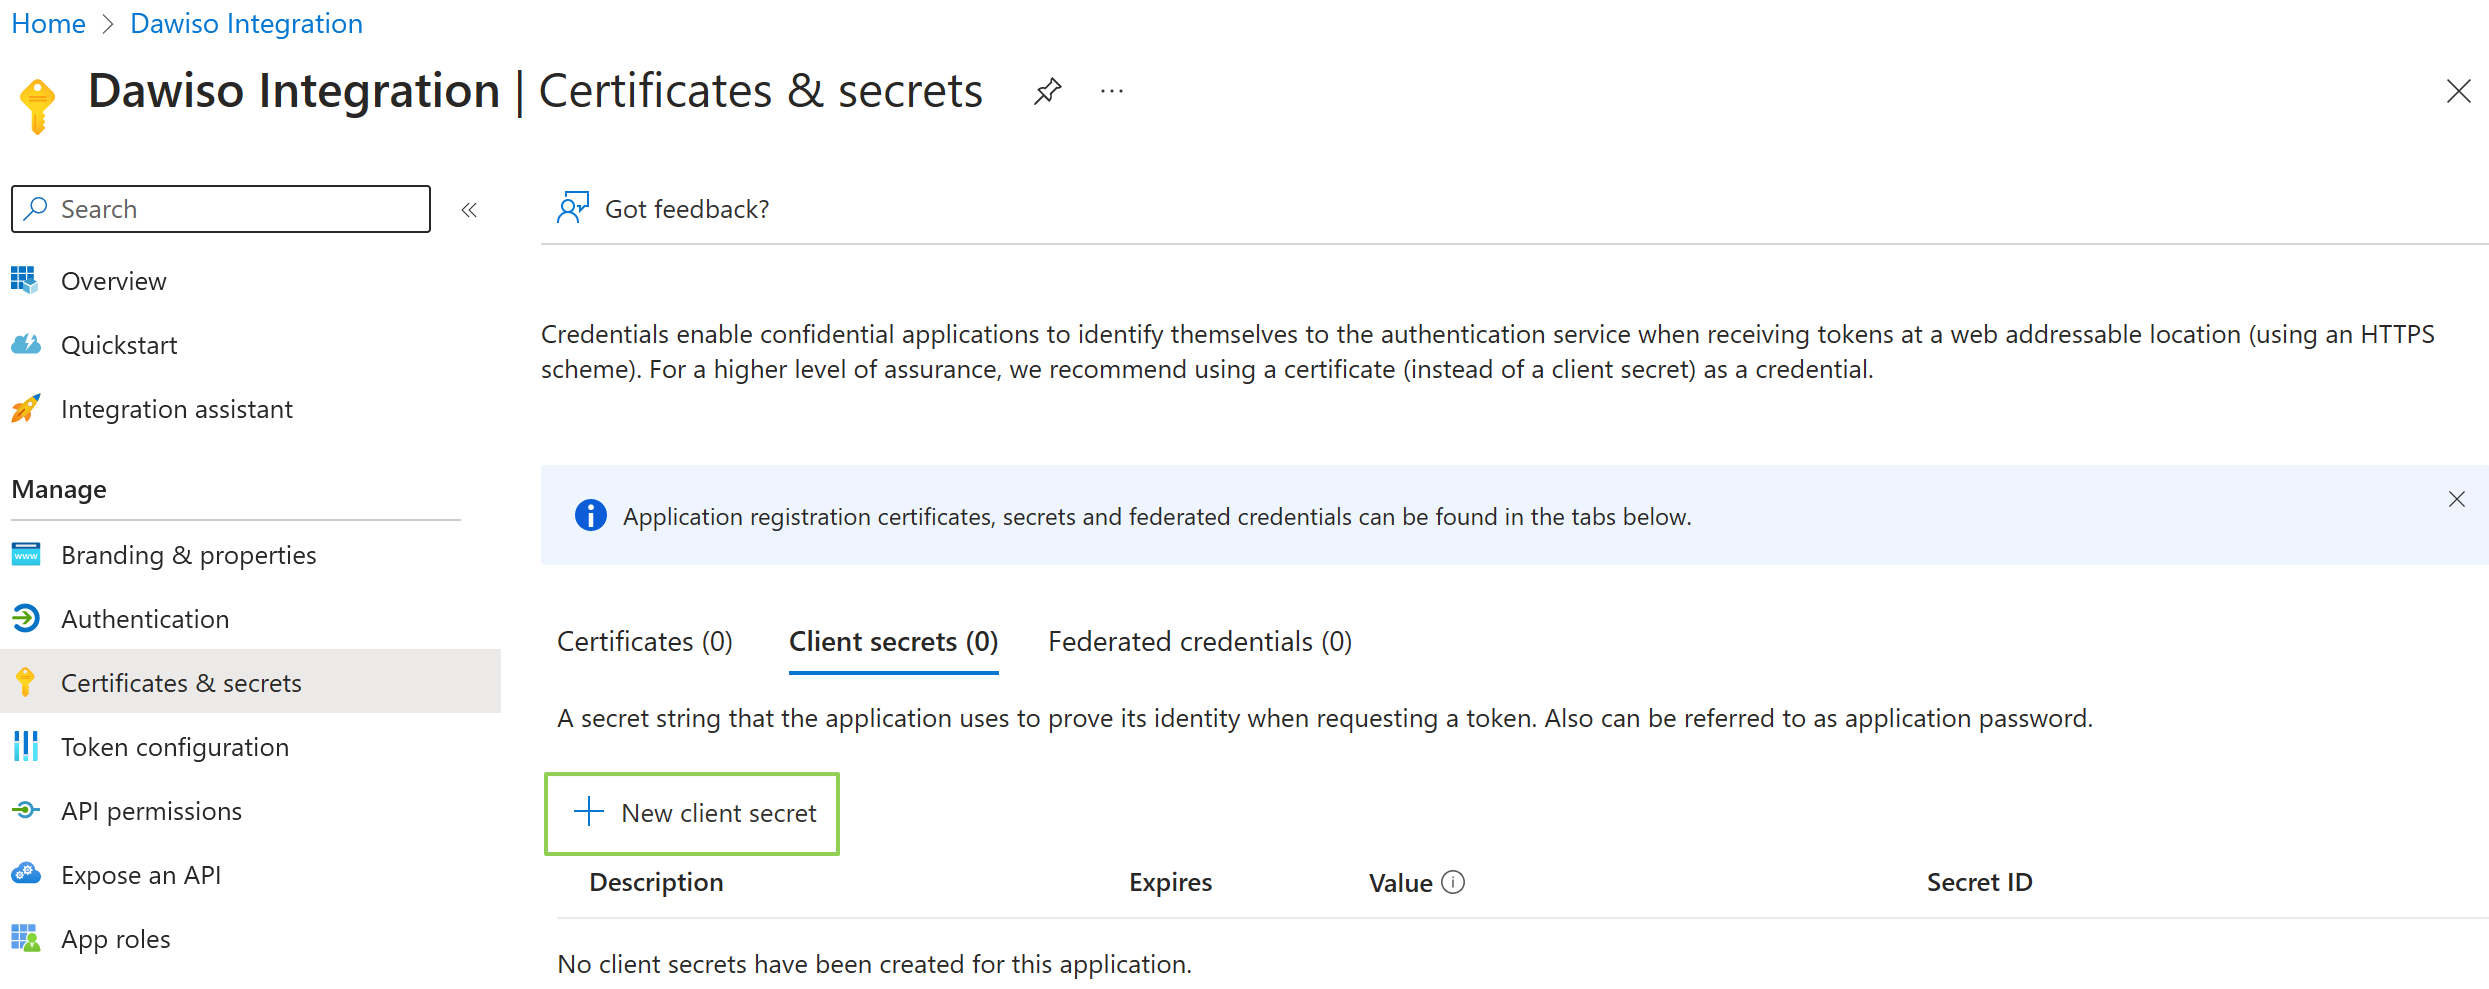
Generate Client Secret
Now, you will need to generate a client secret to later authenticate the connection.
- In the left menu, select Certificates & secrets.
- Here, click + New client secret.
- Choose a descriptive name for the client secret and select an expiration date that fits your organization’s requirements.
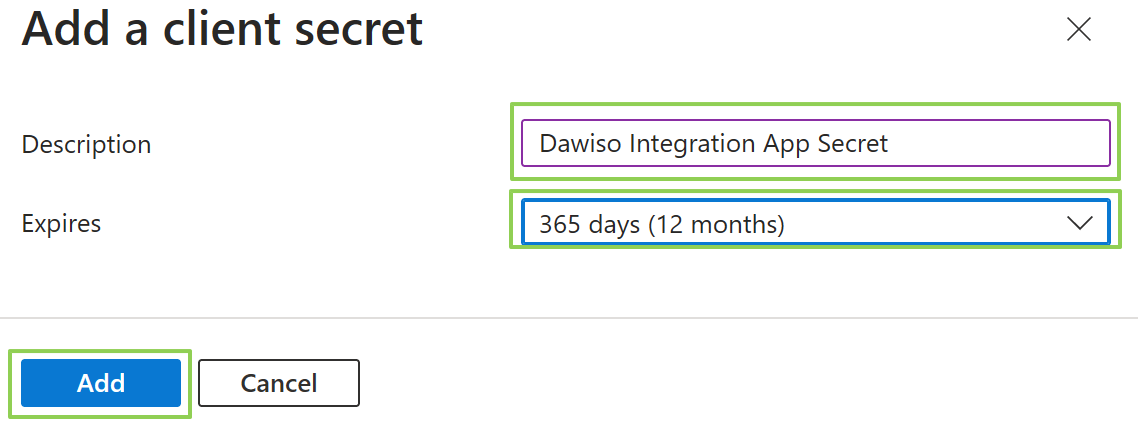
- Click Add to finish creating the secret.
- Once the secret is created, make sure to copy the value and store it somewhere safe for later use. The secret cannot be displayed twice.
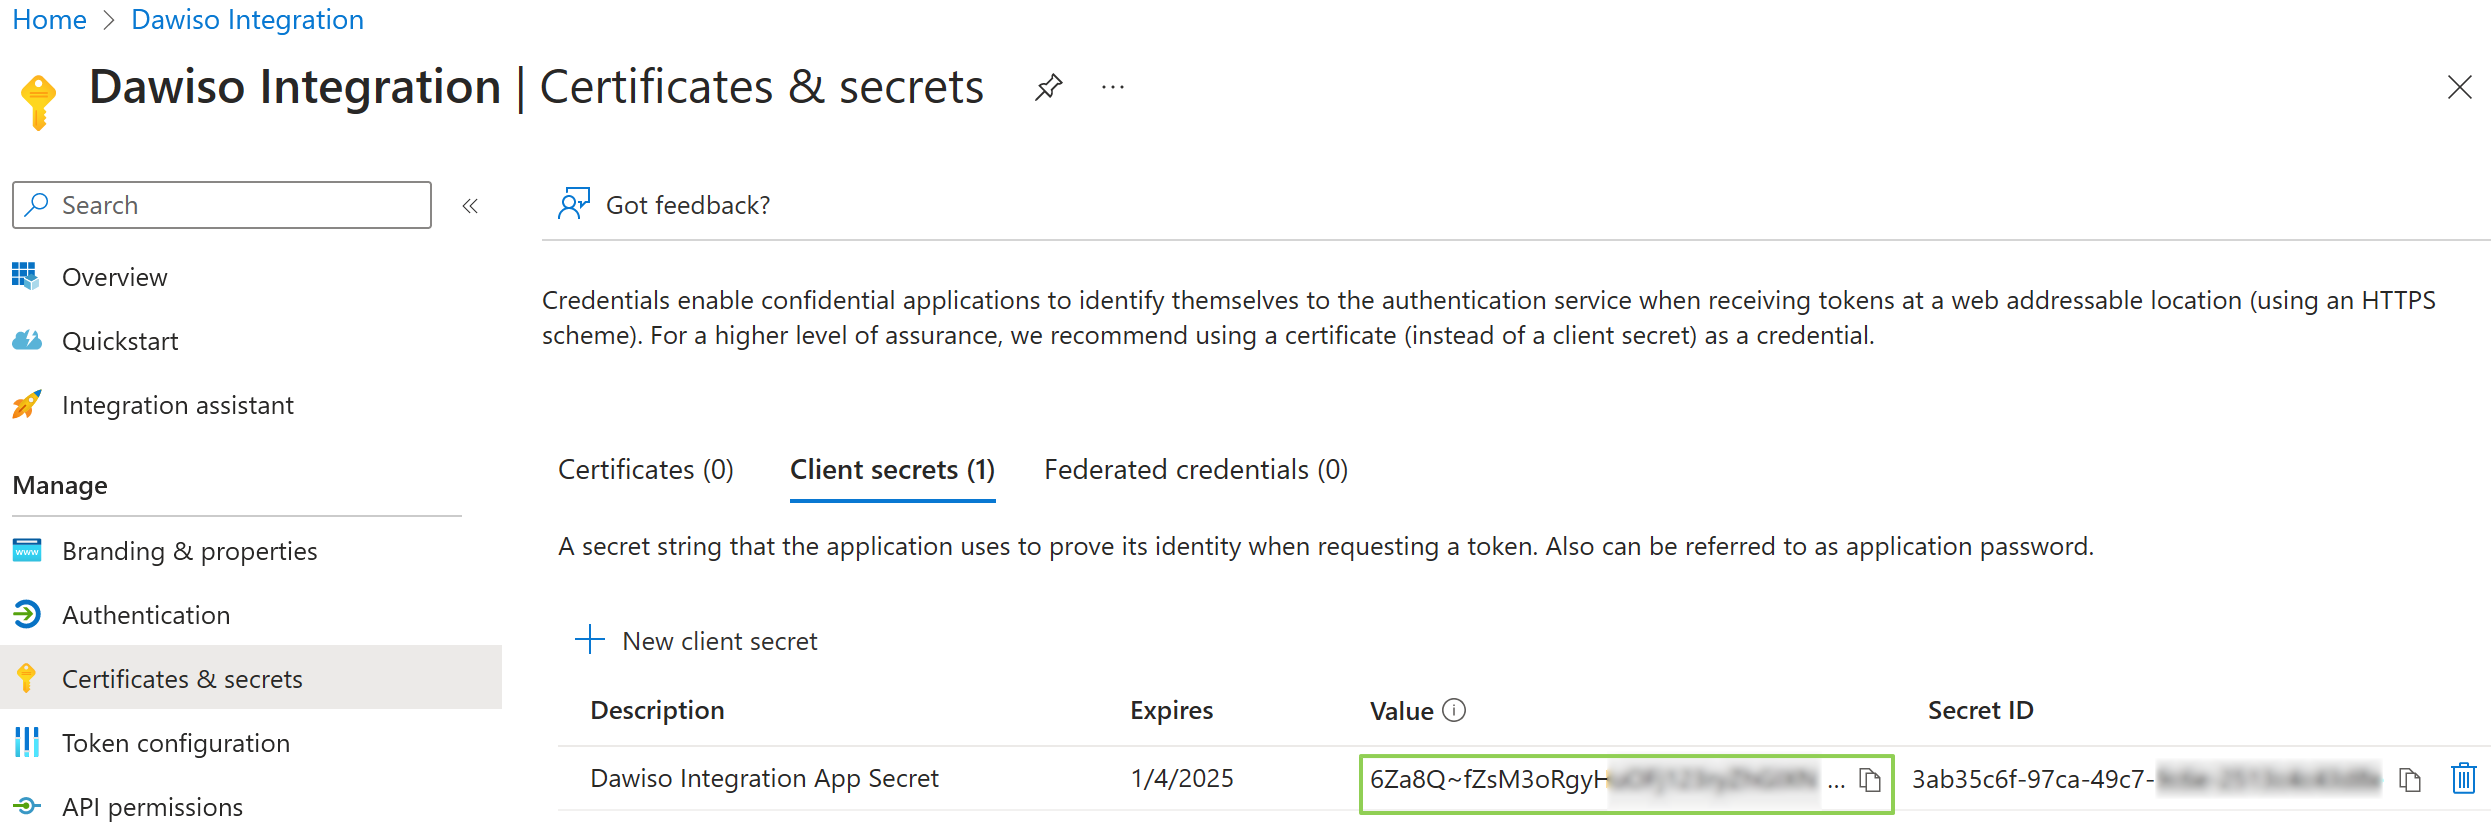
The secret value is displayed only once. Copy and save it immediately, otherwise you will need to generate a new client secret if it is lost.
Grant Microsoft Graph API access to the service principal
In the application blade (=the App Registration view in Azure), navigate to Manage > API Permissions and grant following permissions:
When required, make sure to grant admin consent.
The Directory.Read.All permission may be required only in certain advanced scenarios. We recommend setting up other permissions first and adding Directory.Read.All only when the metadata ingestion fails with the “Insufficient Permission” error.