Before ingesting Power BI metadata into Dawiso, prepare your account for authentication by configuring an Azure Application and granting the necessary permissions.
Supported Power BI versions
- Dawiso reads metadata from the Power BI Admin API and is up to date with the lastest Power BI changes.
Connection prerequisites
- An active Azure Portal subscription (you can create one for free).
- Microsoft Entra ID administrative access.
- Power BI Service tenant and account with administrative privileges. You can use this simple tutorial to configure it.
Connection configuration
Dawiso scans metadata from the Power BI Service API using the Admin API and a few user-level API endpoints. Authentication is performed via service principal instead of a dedicated administrative account. For more details refer to the Power BI official blog post.
In this guide, you will:
- Configure an Azure application.
- Generate a Client Secret.
- Test the application for a successful connection to Azure AD.
- Configure a Power BI Tenant to allow service principals to read the new Admin API.
- Allow the service principal access to individual workspaces.
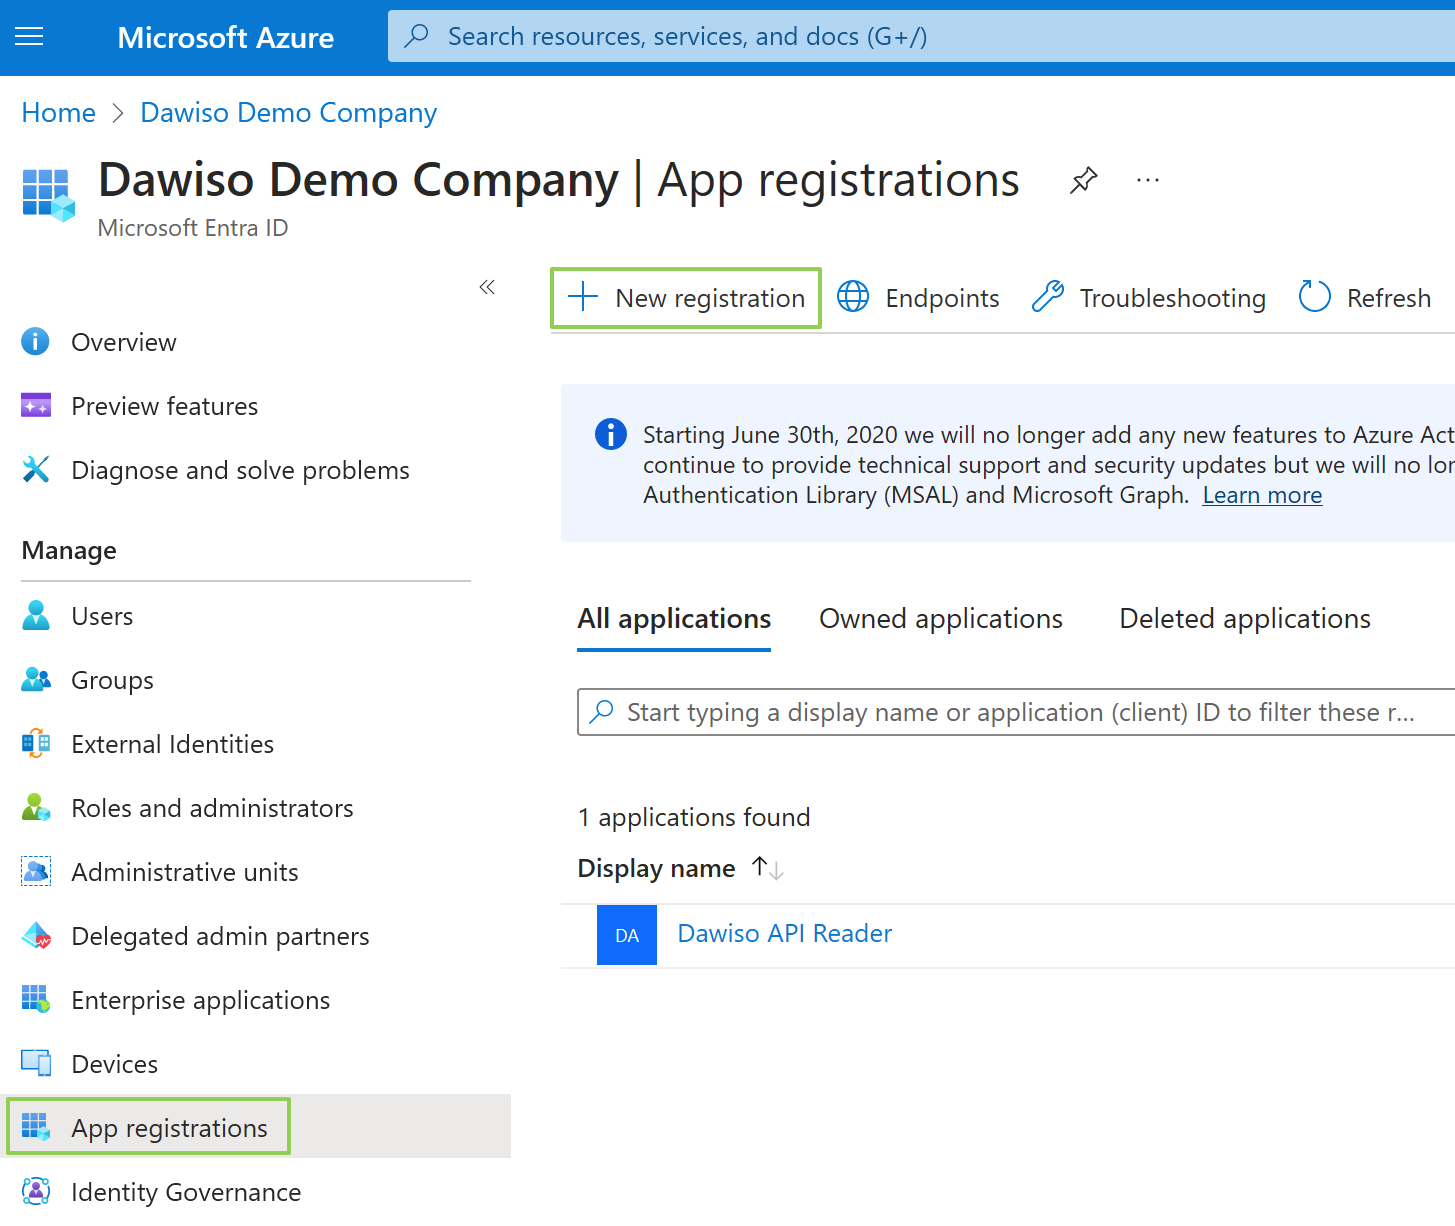
Register a new application
You need to register a new application in Microsoft Entra ID.
- In your Azure Portal, navigate to Microsoft Entra ID.
- In the left menu, select the App Registrations. Click the + New Registration button.
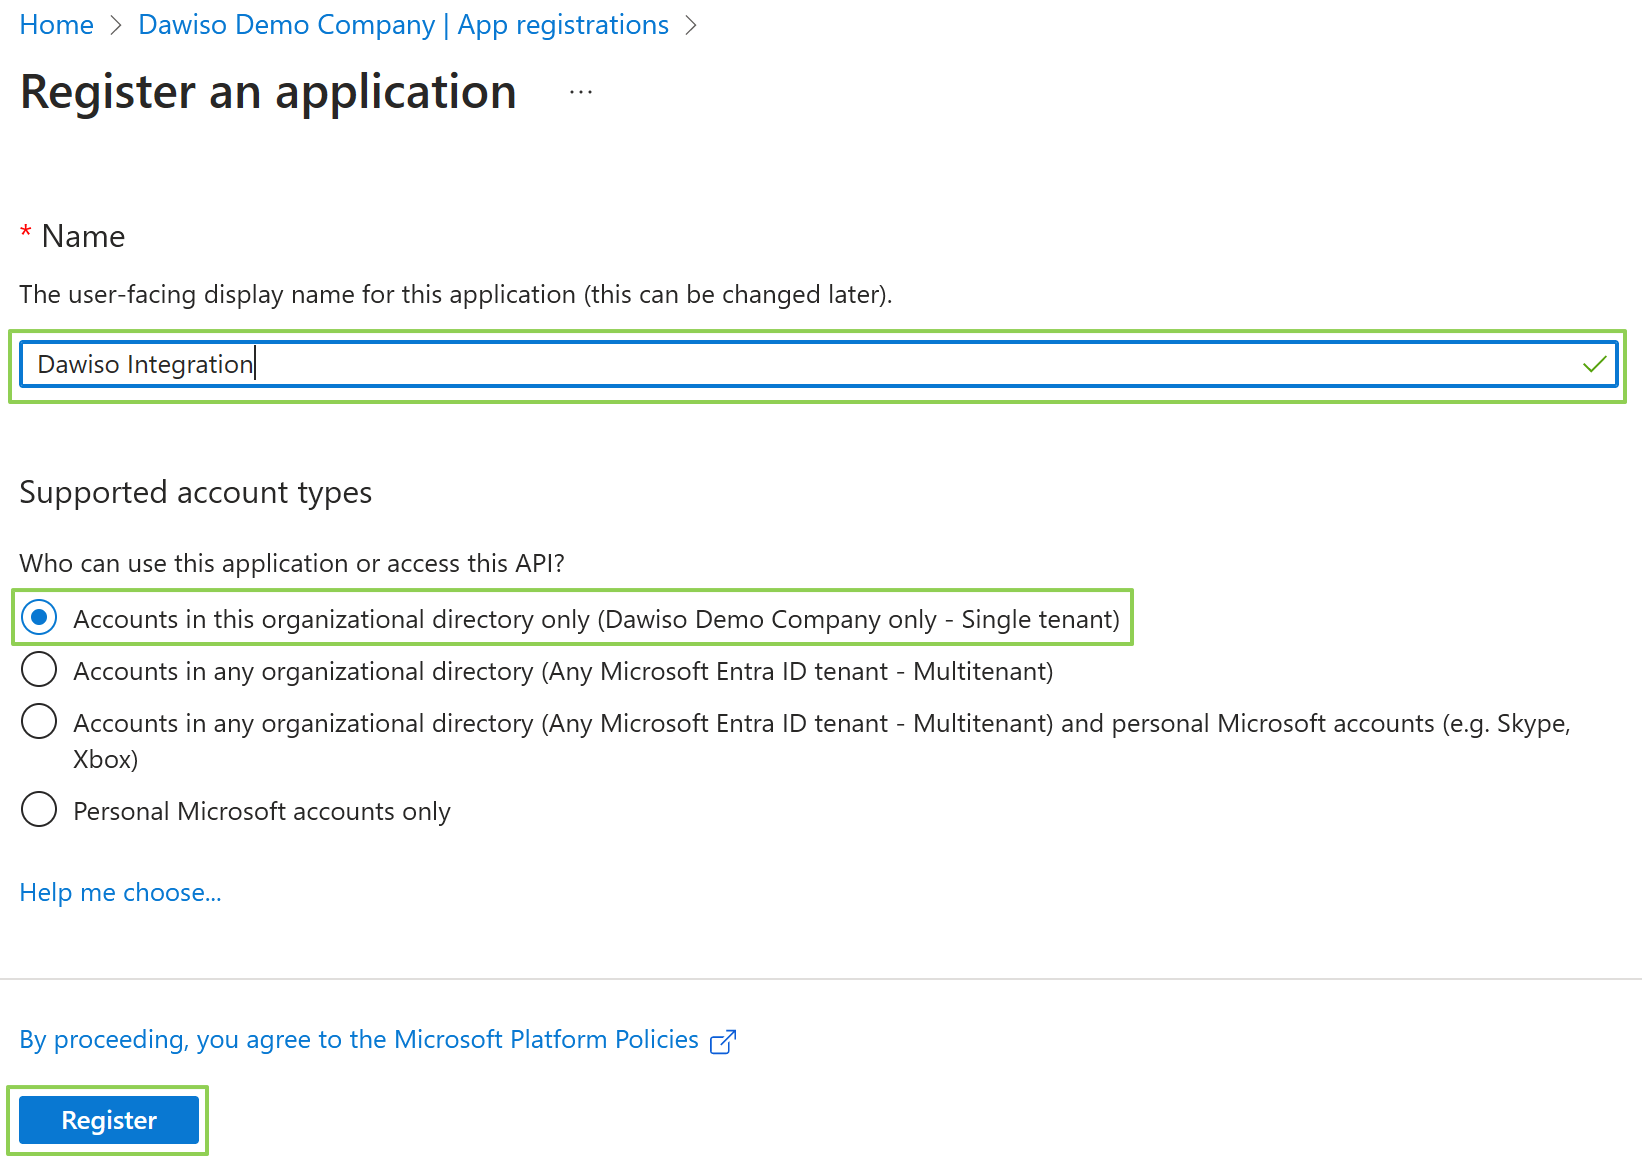
- Choose a name name for your application, e.g., Dawiso Integration. You can keep default values for the rest of the form.
- Click Register and wait for the deployment to finish.
Client and tenant IDs
On the Overview page, you can find important values that identify your application. These will be used in the connection setup in Dawiso:
- Application (client) ID is the unique identification of the application.
- Directory (tenant) ID is the unique identification of your tenant (organization).
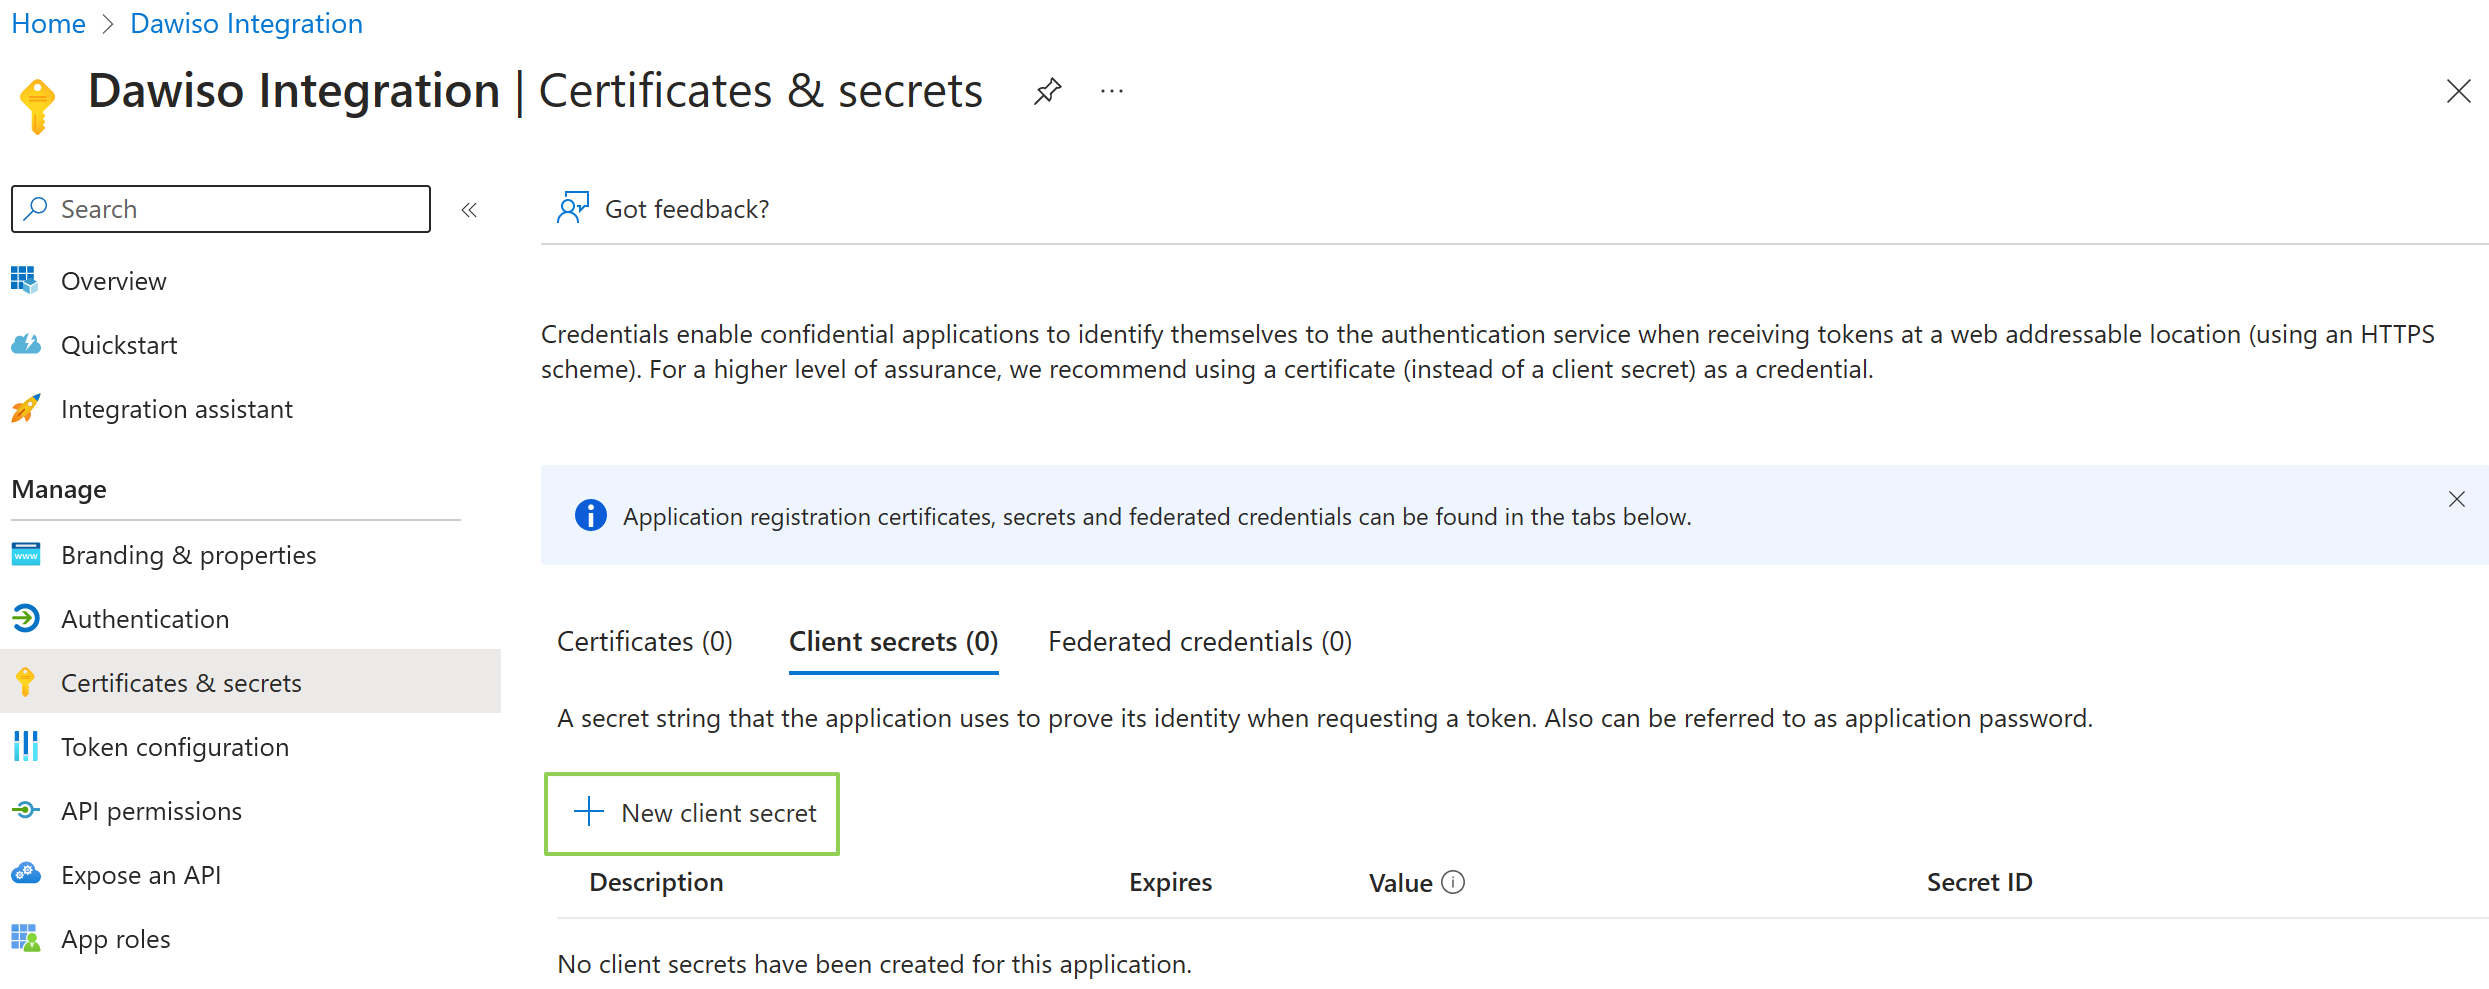
Generate Client Secret
Now, you will need to generate a client secret to later authenticate the connection.
- In the left menu, select Certificates & secrets.
- Here, click + New client secret.
- Choose a descriptive name for the client secret and select an expiration date that fits your organization’s requirements.
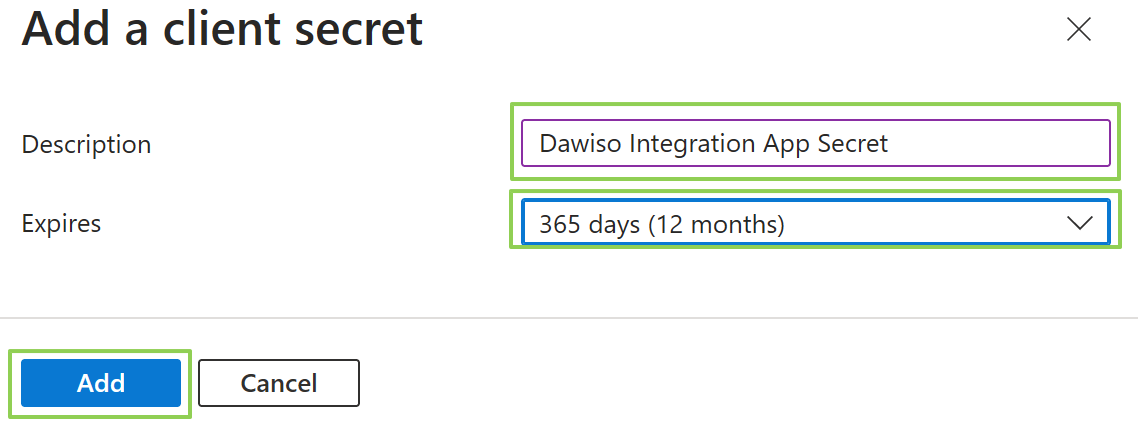
- Click Add to finish creating the secret.
- Once the secret is created, make sure to copy the value and store it somewhere safe for later use. The secret cannot be displayed twice.
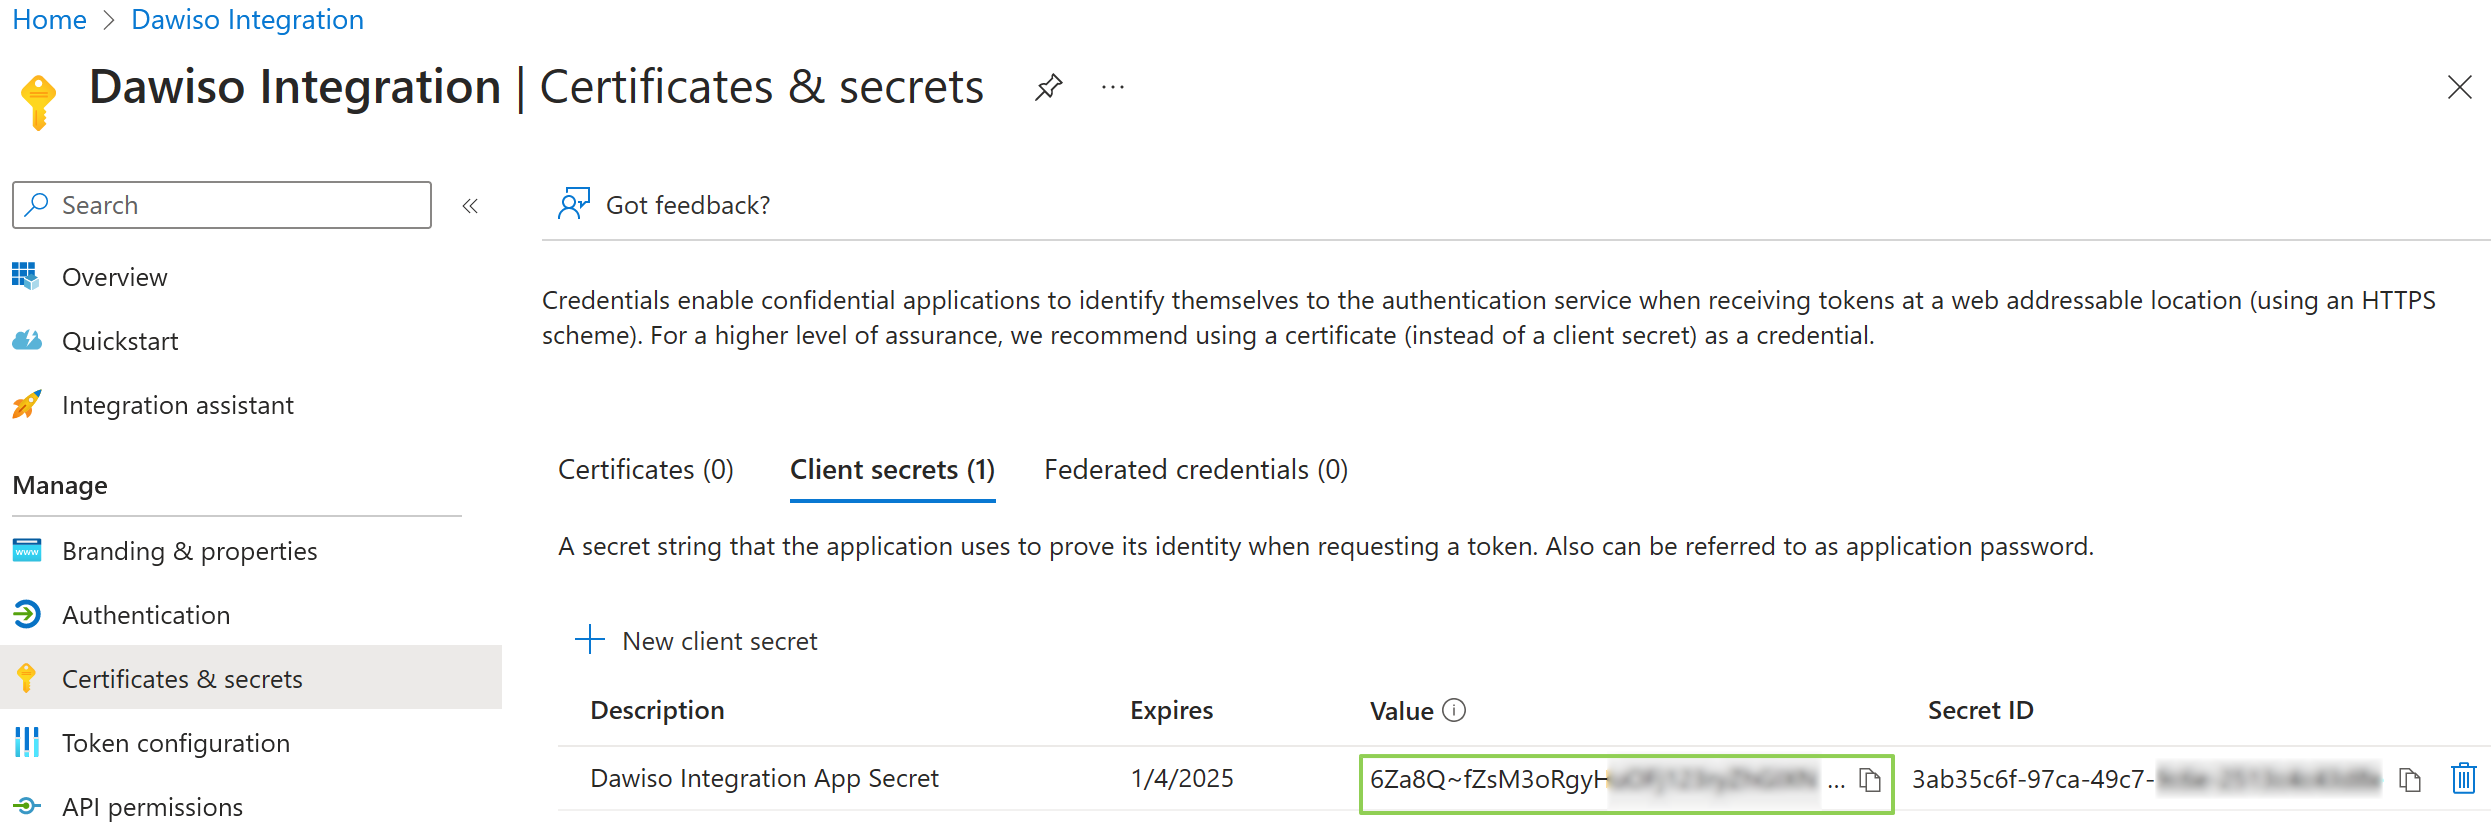
The secret value is displayed only once. Copy and save it immediately, otherwise you will need to generate a new client secret if it is lost.
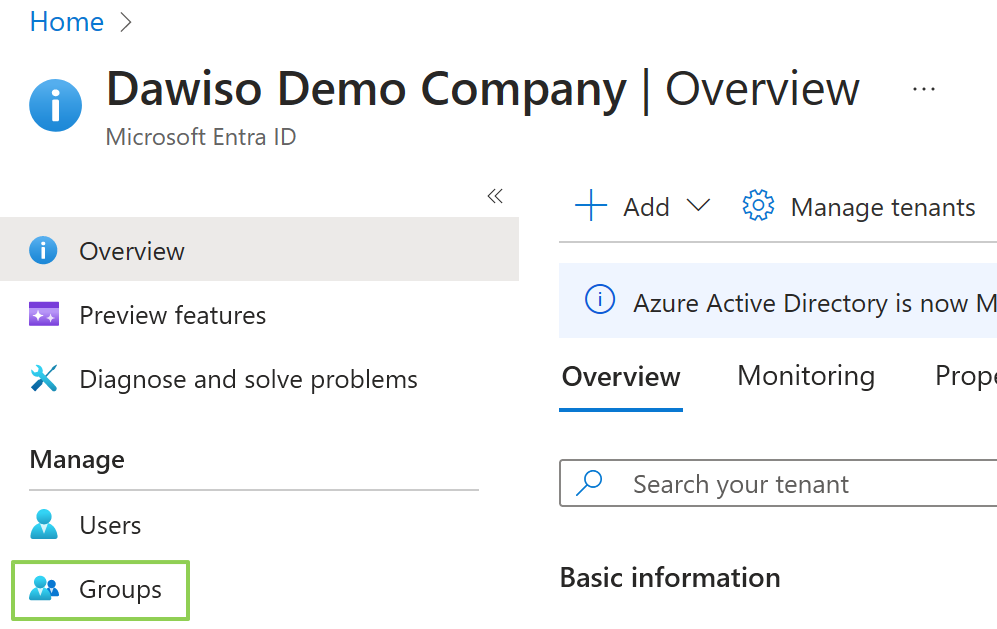
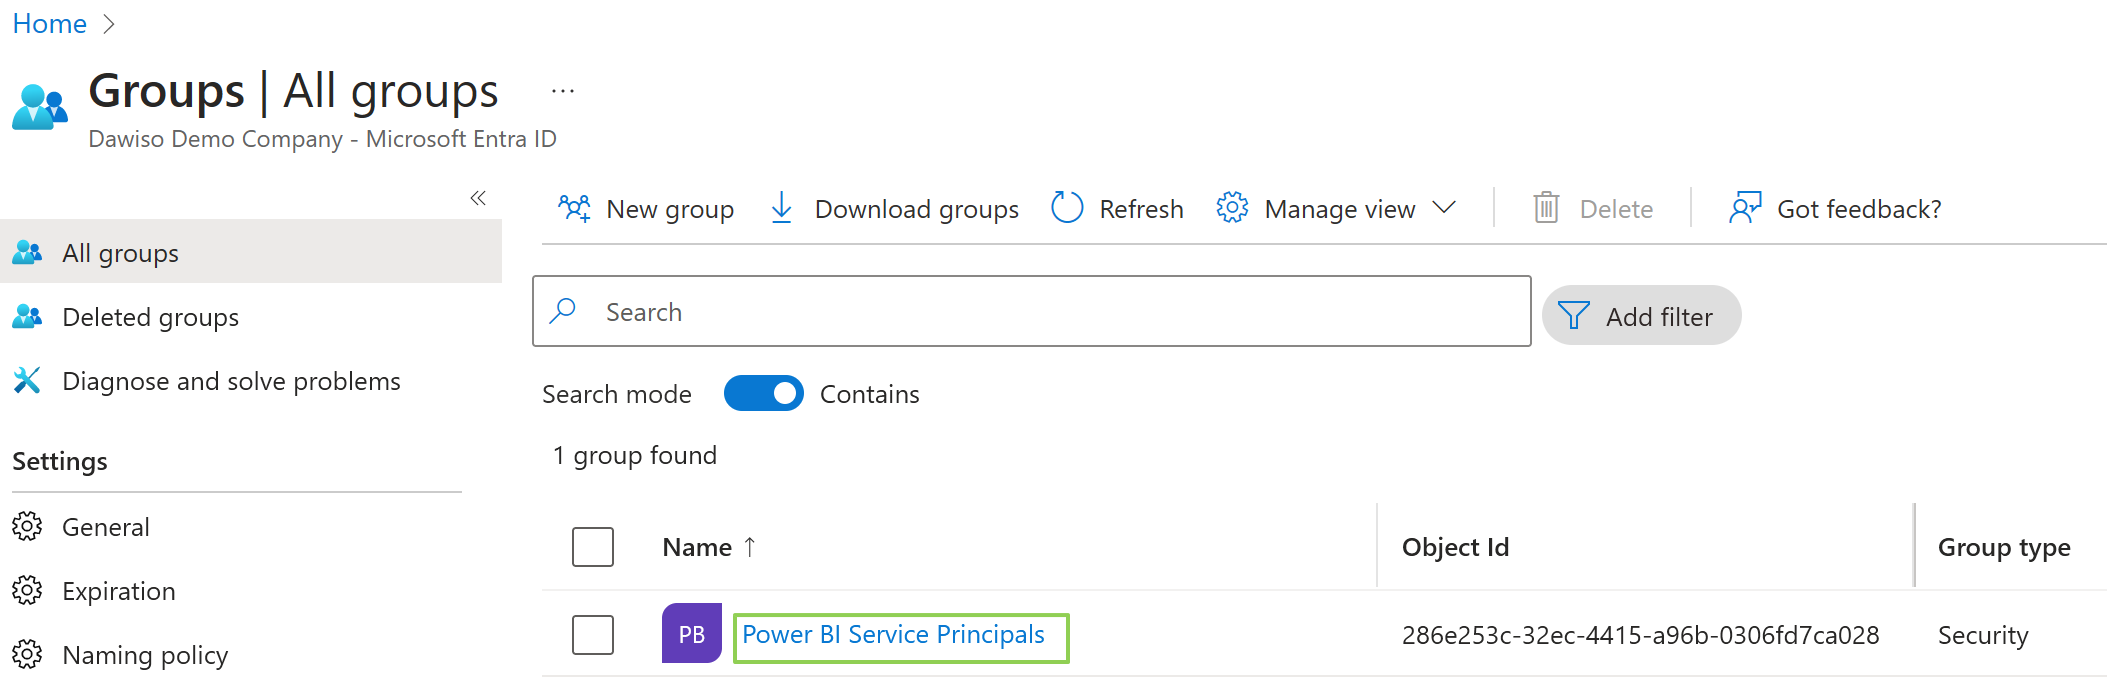
Create a security group in Microsoft Entra ID
To follow security best practices, assign Power BI Admin API access to the service principal via a Microsoft Entra ID security group only.
- In your Microsoft Entra ID, navigate to Groups.
- Click New group.
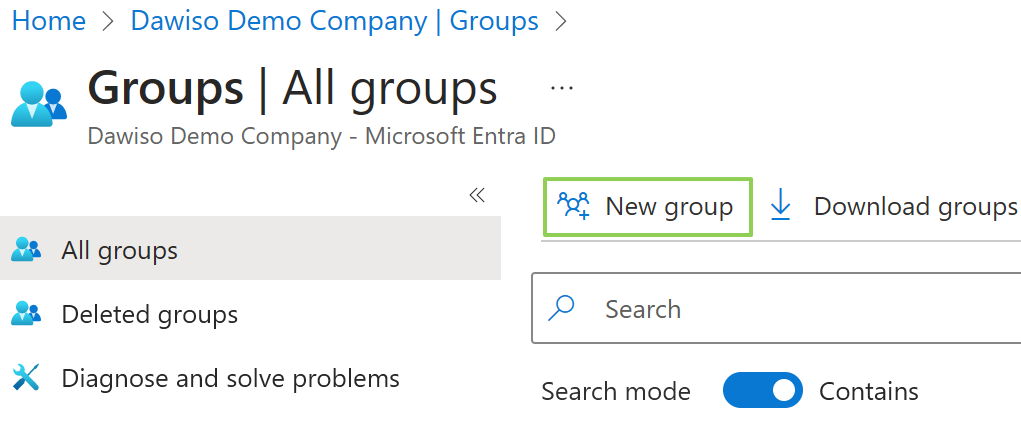
- Choose the Security group type and choose a descriptive name, e.g., in this case,
Power BI Service Principals.
- Click Create to finish the group configuration.
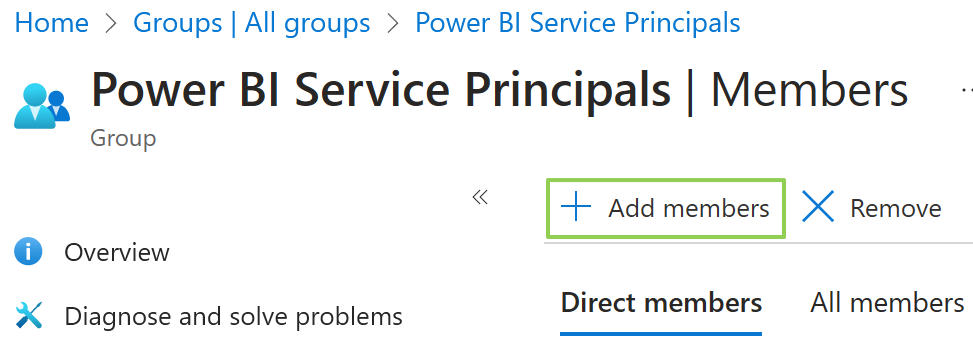
Add members to the group
- On the Groups page, click the name of the newly created group.
- Click + Add members.
- Using the search box, find your application (in our case Dawiso Integration) and select it using the checkbox.
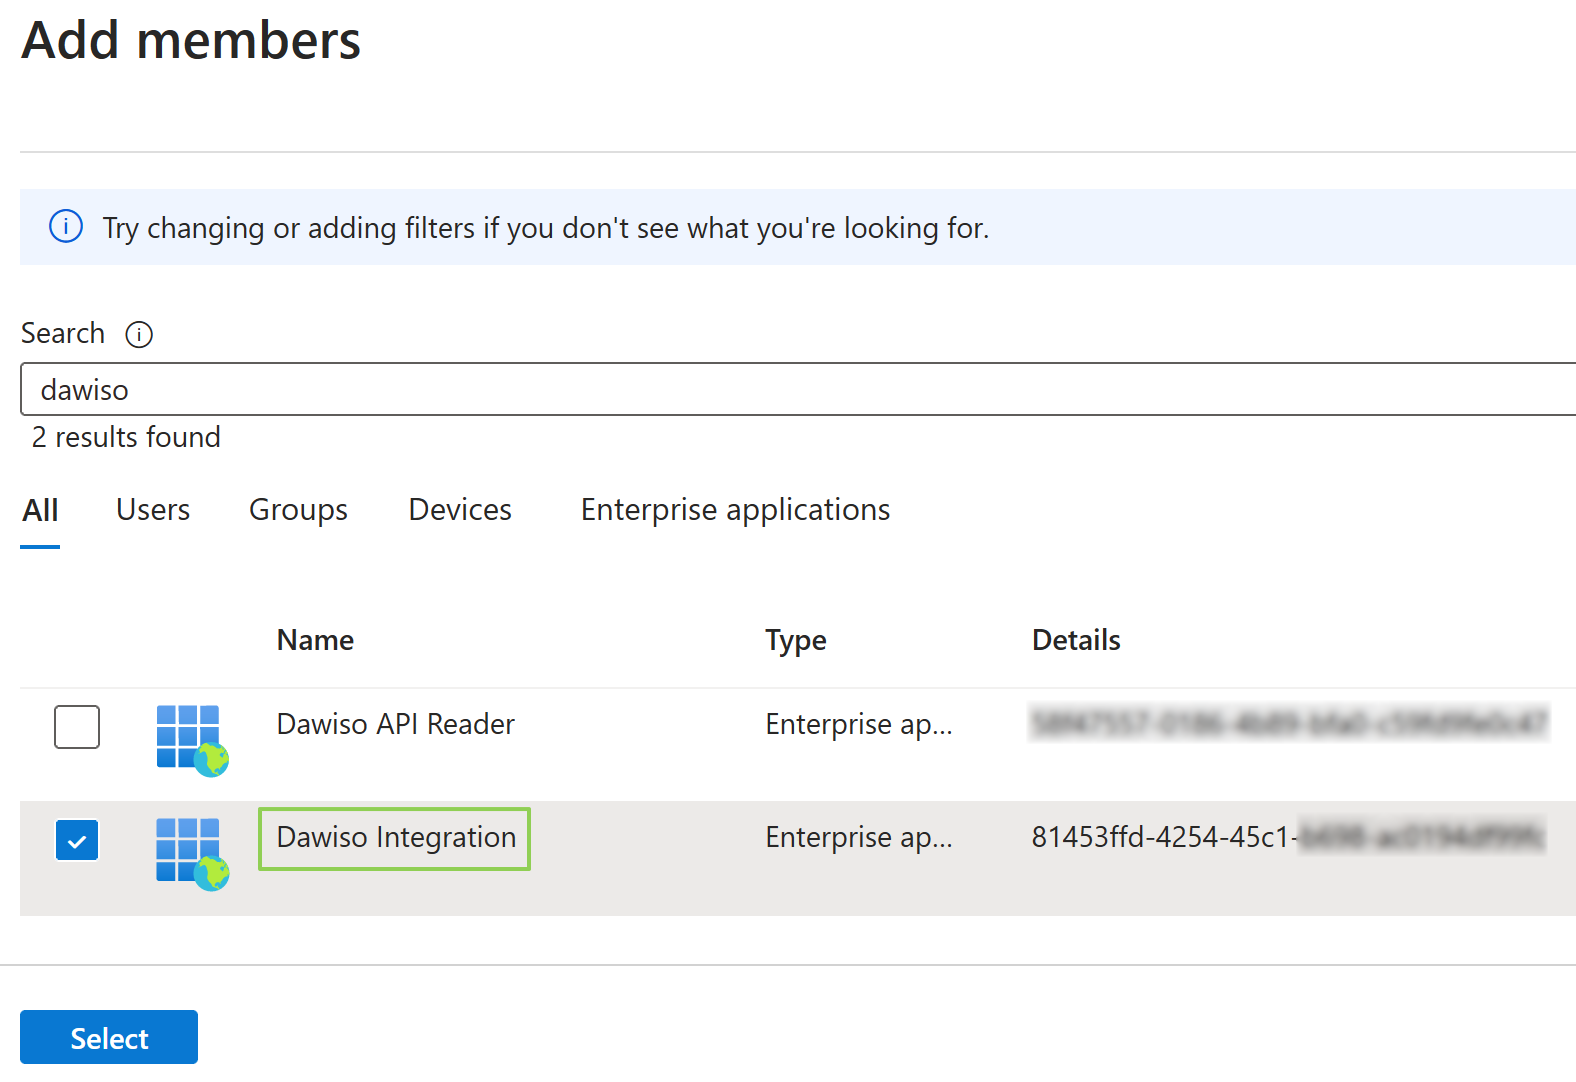
- Click Select to finish adding the application as a member.
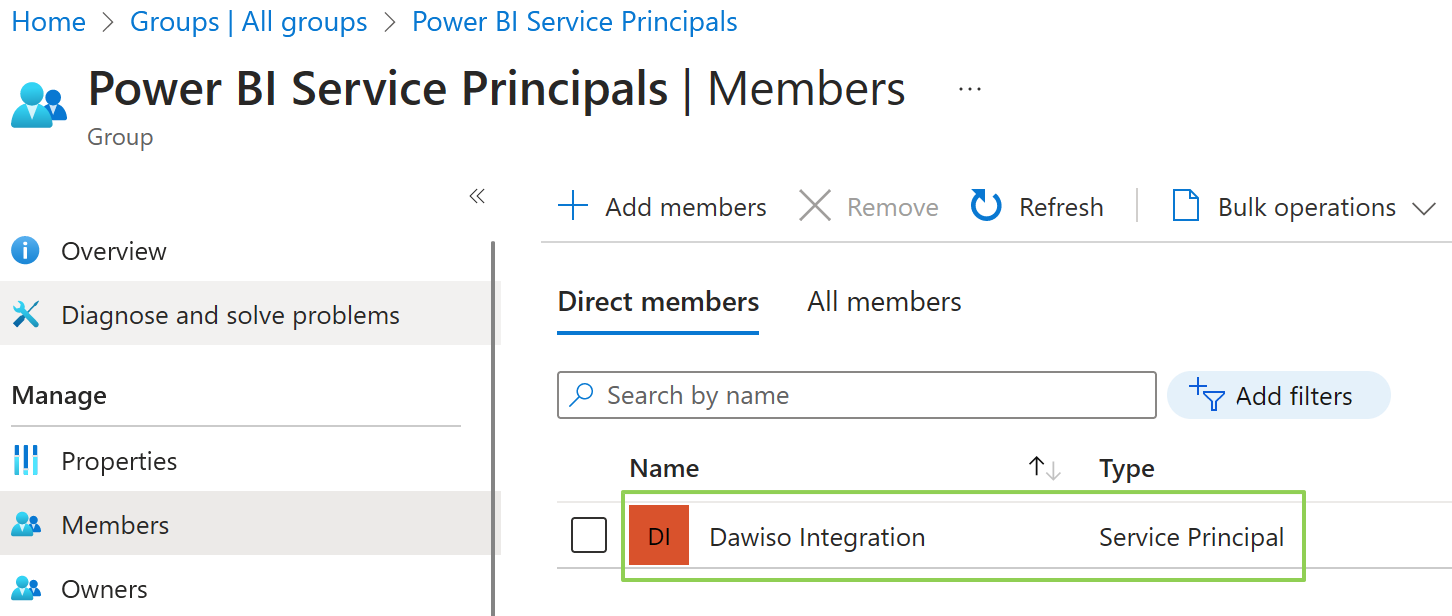
- On the group’s page, you can double-check whether the application has been added successfully.
Configure Power BI Tenant
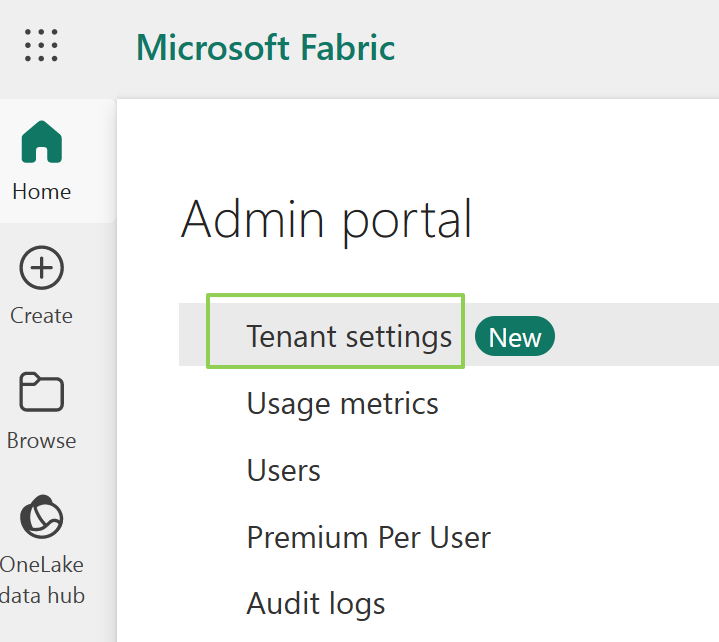
Using an account with administrative privileges, navigate to your Power BI Admin Portal. Here, you can create a new Power Platform and Fabric Administrator or assign an existing user to the role. See more details in the Microsoft Fabric documentation.
- Select Tenant settings in the Portal.
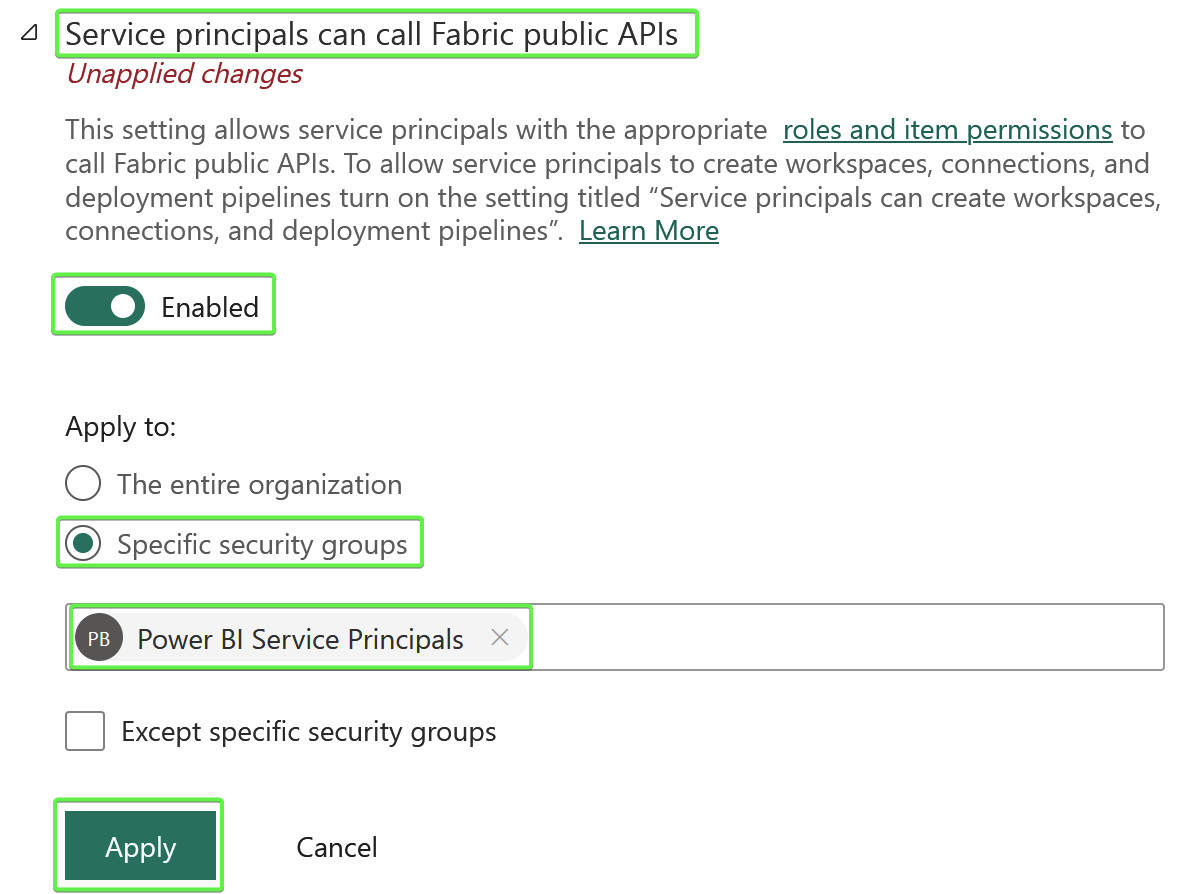
- In the Developer settingssection:
- Find the Service principals can call Fabric public APIs item and enable it.
- Apply it to Specific security groups.
- Find the newly created security group (in our case Power BI Service Principals) and add it.
- Click Apply to save the configuration.
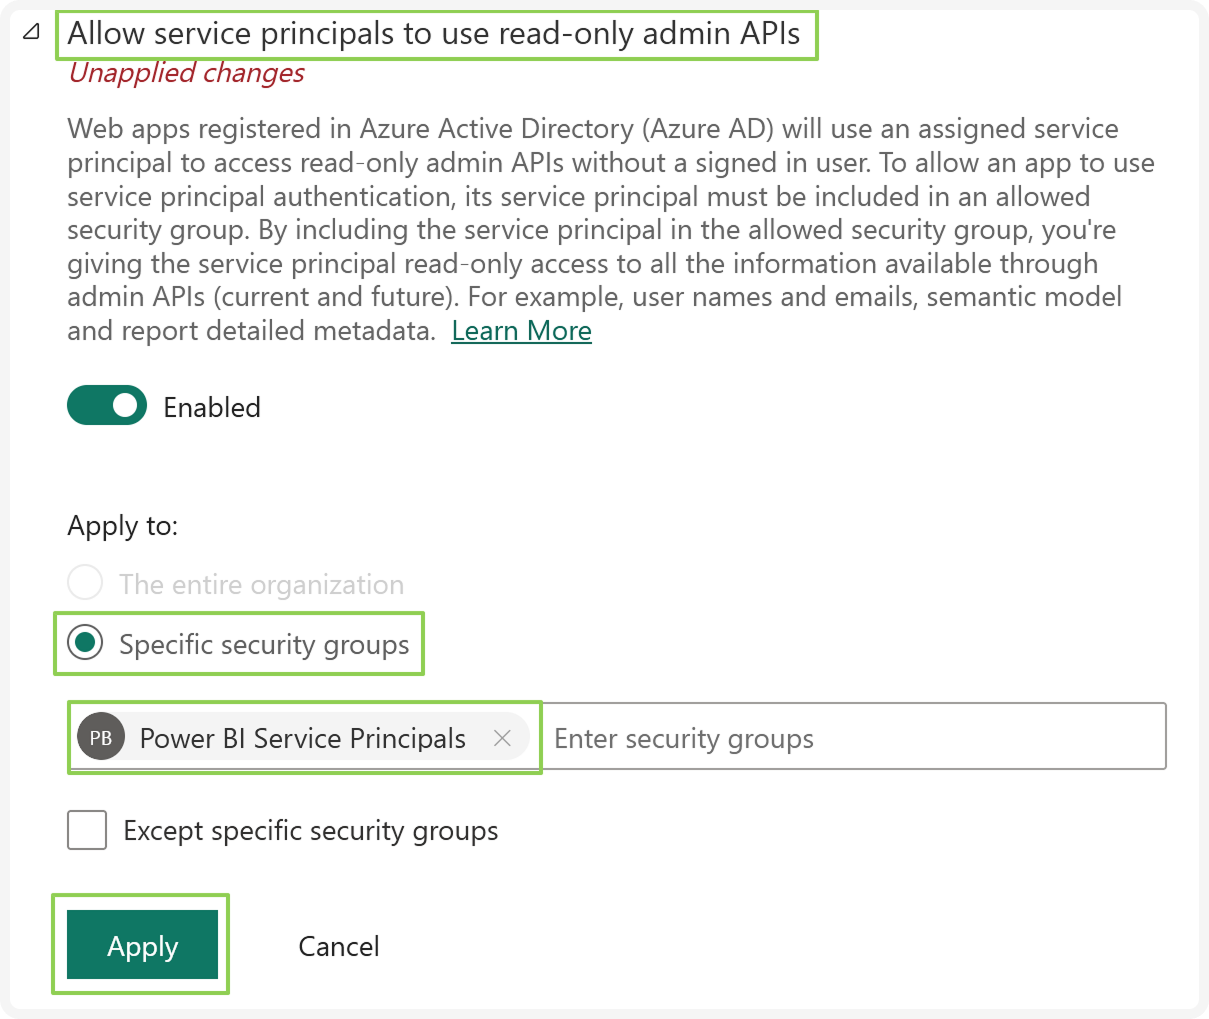
- In the Admin API settings section:
- Find the Allow service principals to use read-only admin APIs item and enable it.
- Apply it to Specific security groups.
- Find the newly created security group (in our case Power BI Service Principals) and add it.
- Click Apply to save the configuration.
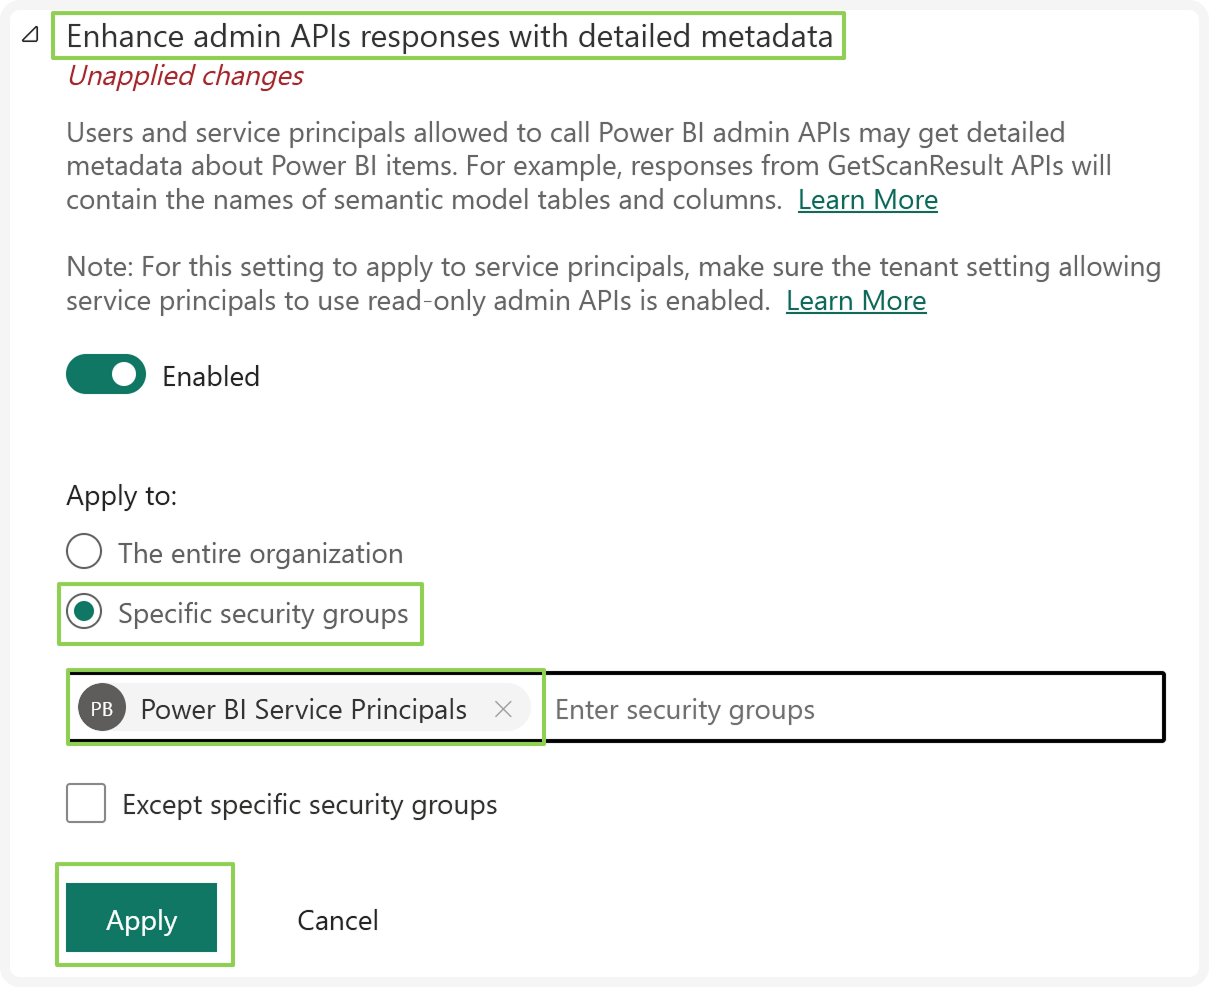
- Also in the Admin API settingssection:
- Find the Enhance admin APIs responses with detailed metadata item and enable it.
- Apply it to Specific security groups.
- Find the newly created security group (in our case Power BI Service Principals) and add it.
- Click Apply to finish the configuration.
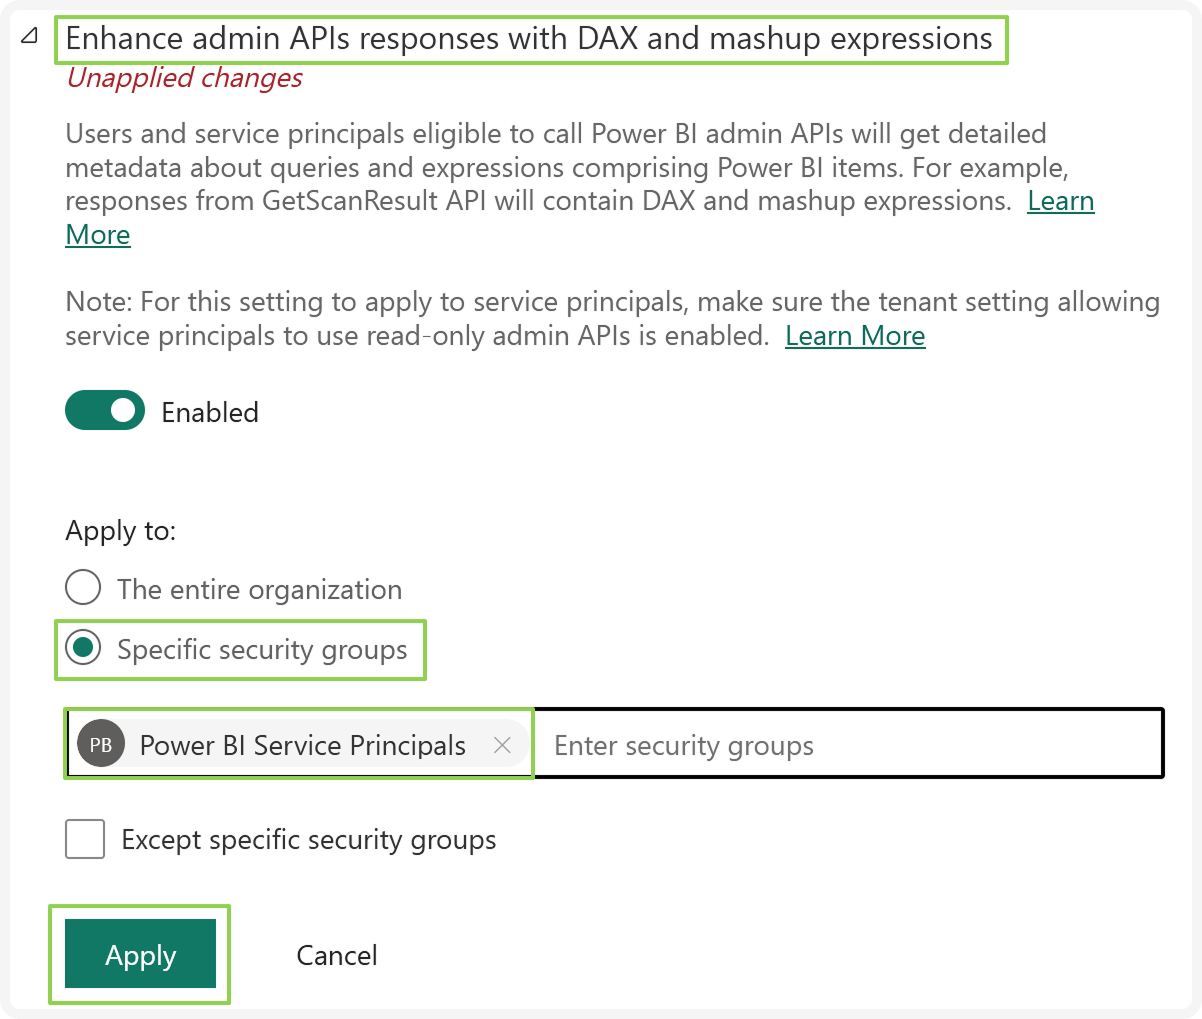
- Finally, again in the Admin API settingssection:
- find the Enhance admin APIs responses with DAX and mashup expressions item and enable it.
- Apply it to Specific security groups.
- Find the newly created security group (in our case Power BI Service Principals) and add it.
- Click Apply to save the configuration.
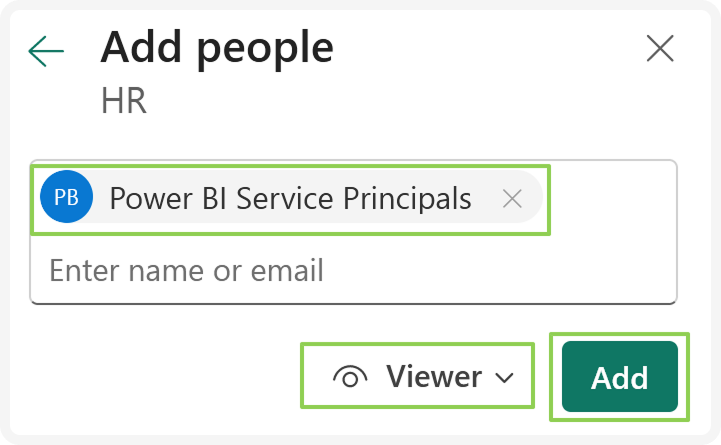
Allow Service Principal access to individual workspaces
To ingest certain assets (such as Report Pages), make sure the Service Principal has access to all workspaces from which you will ingest them.
- On your Power BI homepage, select the workspace for which you want to configure the access.
- Click Manage access.
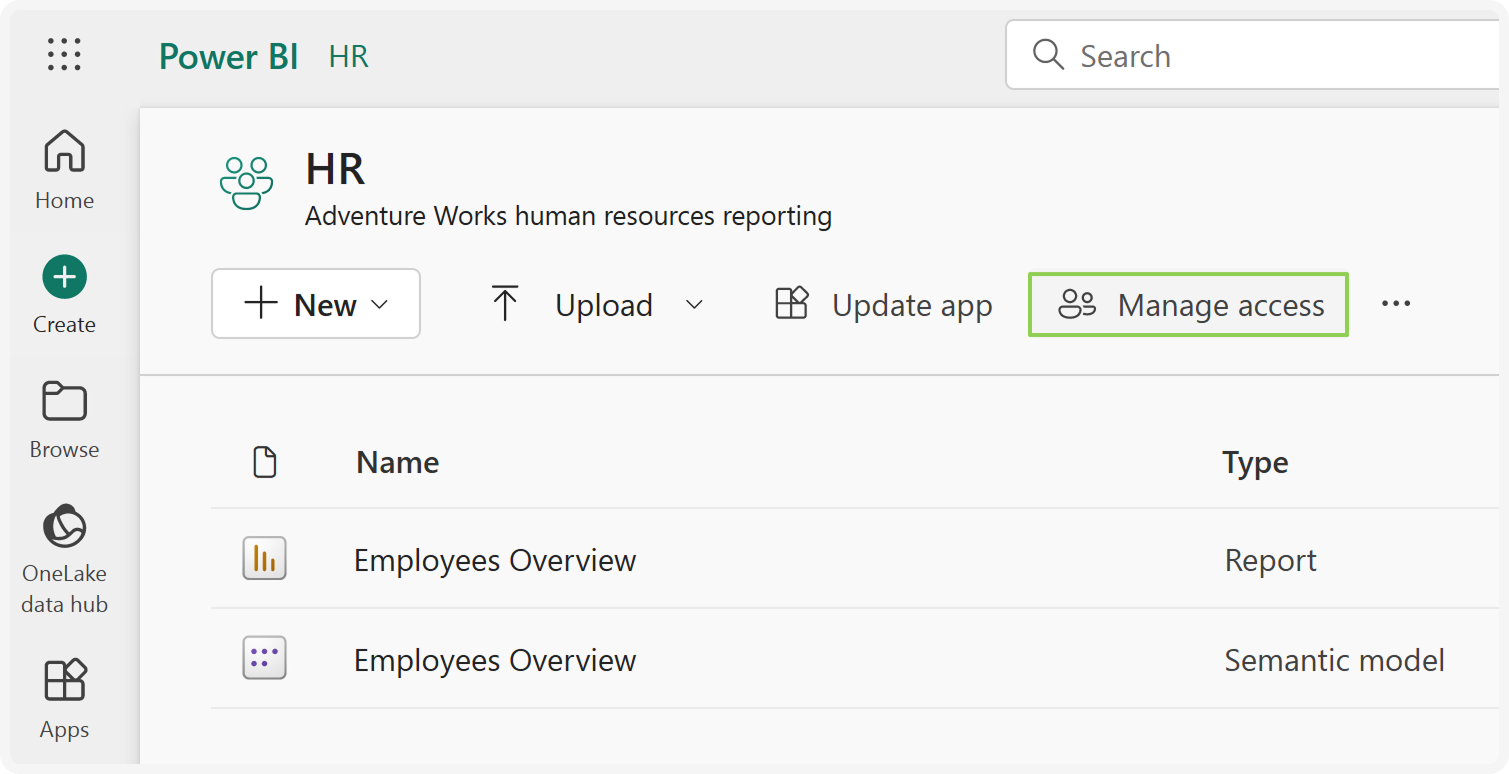
- Continue with clicking Add people or groups.
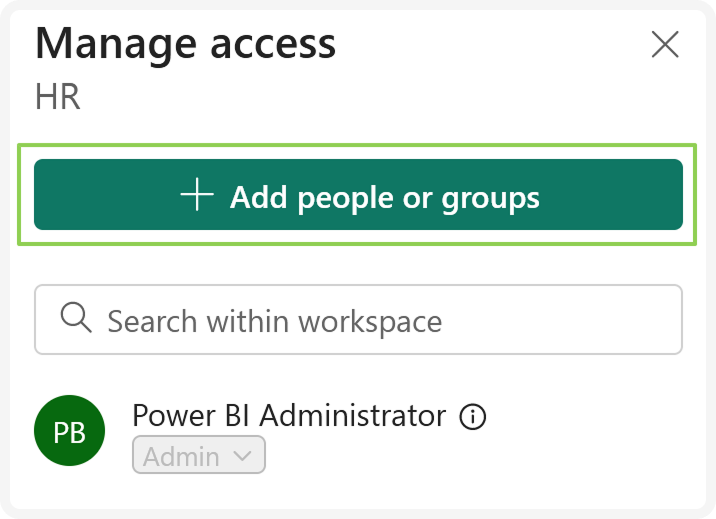
- Find the newly created security group (in our case Power BI Service Principals) and change its role to Viewer.
- Click Add to allow the security group to access your workspace with viewer rights.